Classroom Control Panels
In Student Building SB015, you will find two instructor control panels. One on the “front” lower level, furthest from the main entrance; and one on the upper level, near the center steps. Both of these control panels look the same, have a mouse and keyboard for controlling the “Desktop PC,” as well as an HDMI cable to plug in an instructor’s laptop if you so choose.
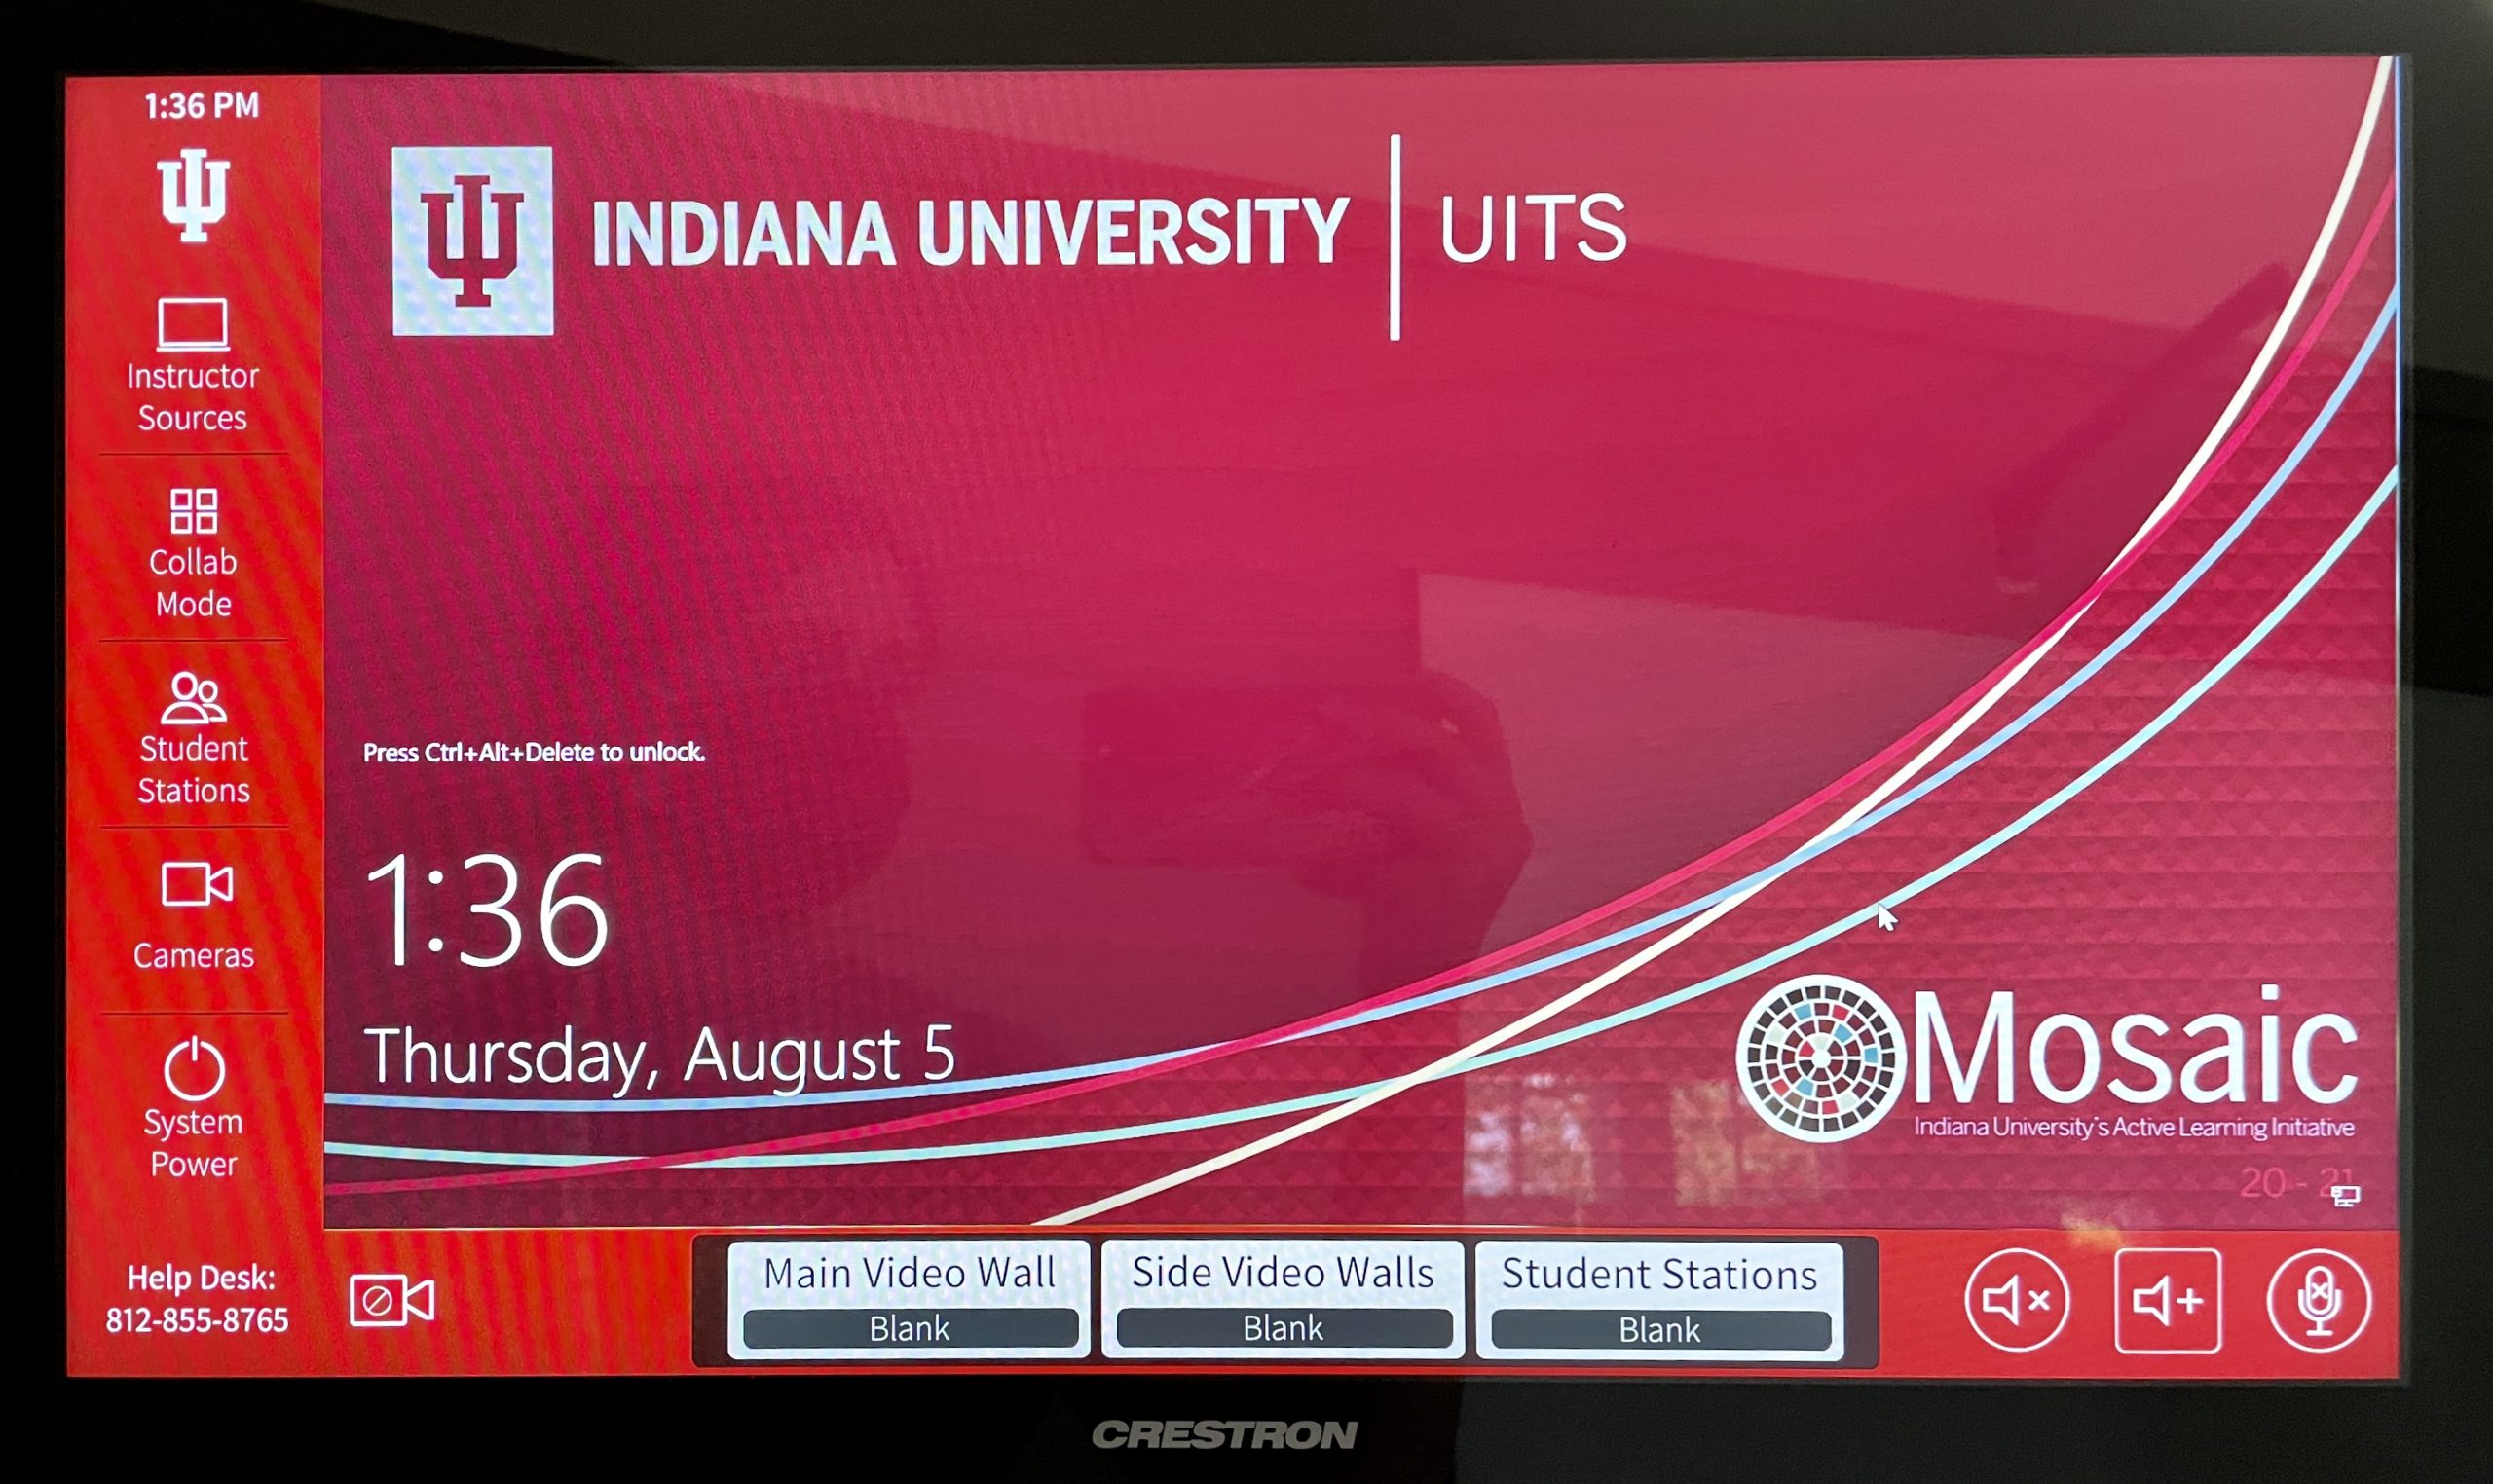 Main Screen
On this control panel, the left and bottom bars in “traditional red” show touch enabled buttons that allow instructors to control what sources are projected in the room and where, as well as volume of speakers, muting microphones, and classroom camera controls.
The larger portion with the date/time stamp and IU UITS branding is what we refer to as a confidence monitor. It is NOT touch reactive but rather will preview the source that is selected so an instructor can see the source before pushing it out to a destination.
For example, an instructor can select the “Desktop PC” and not select a source on the bottom in order to login, open applications, authenticate into Canvas, etc. all before displaying anything to the class.
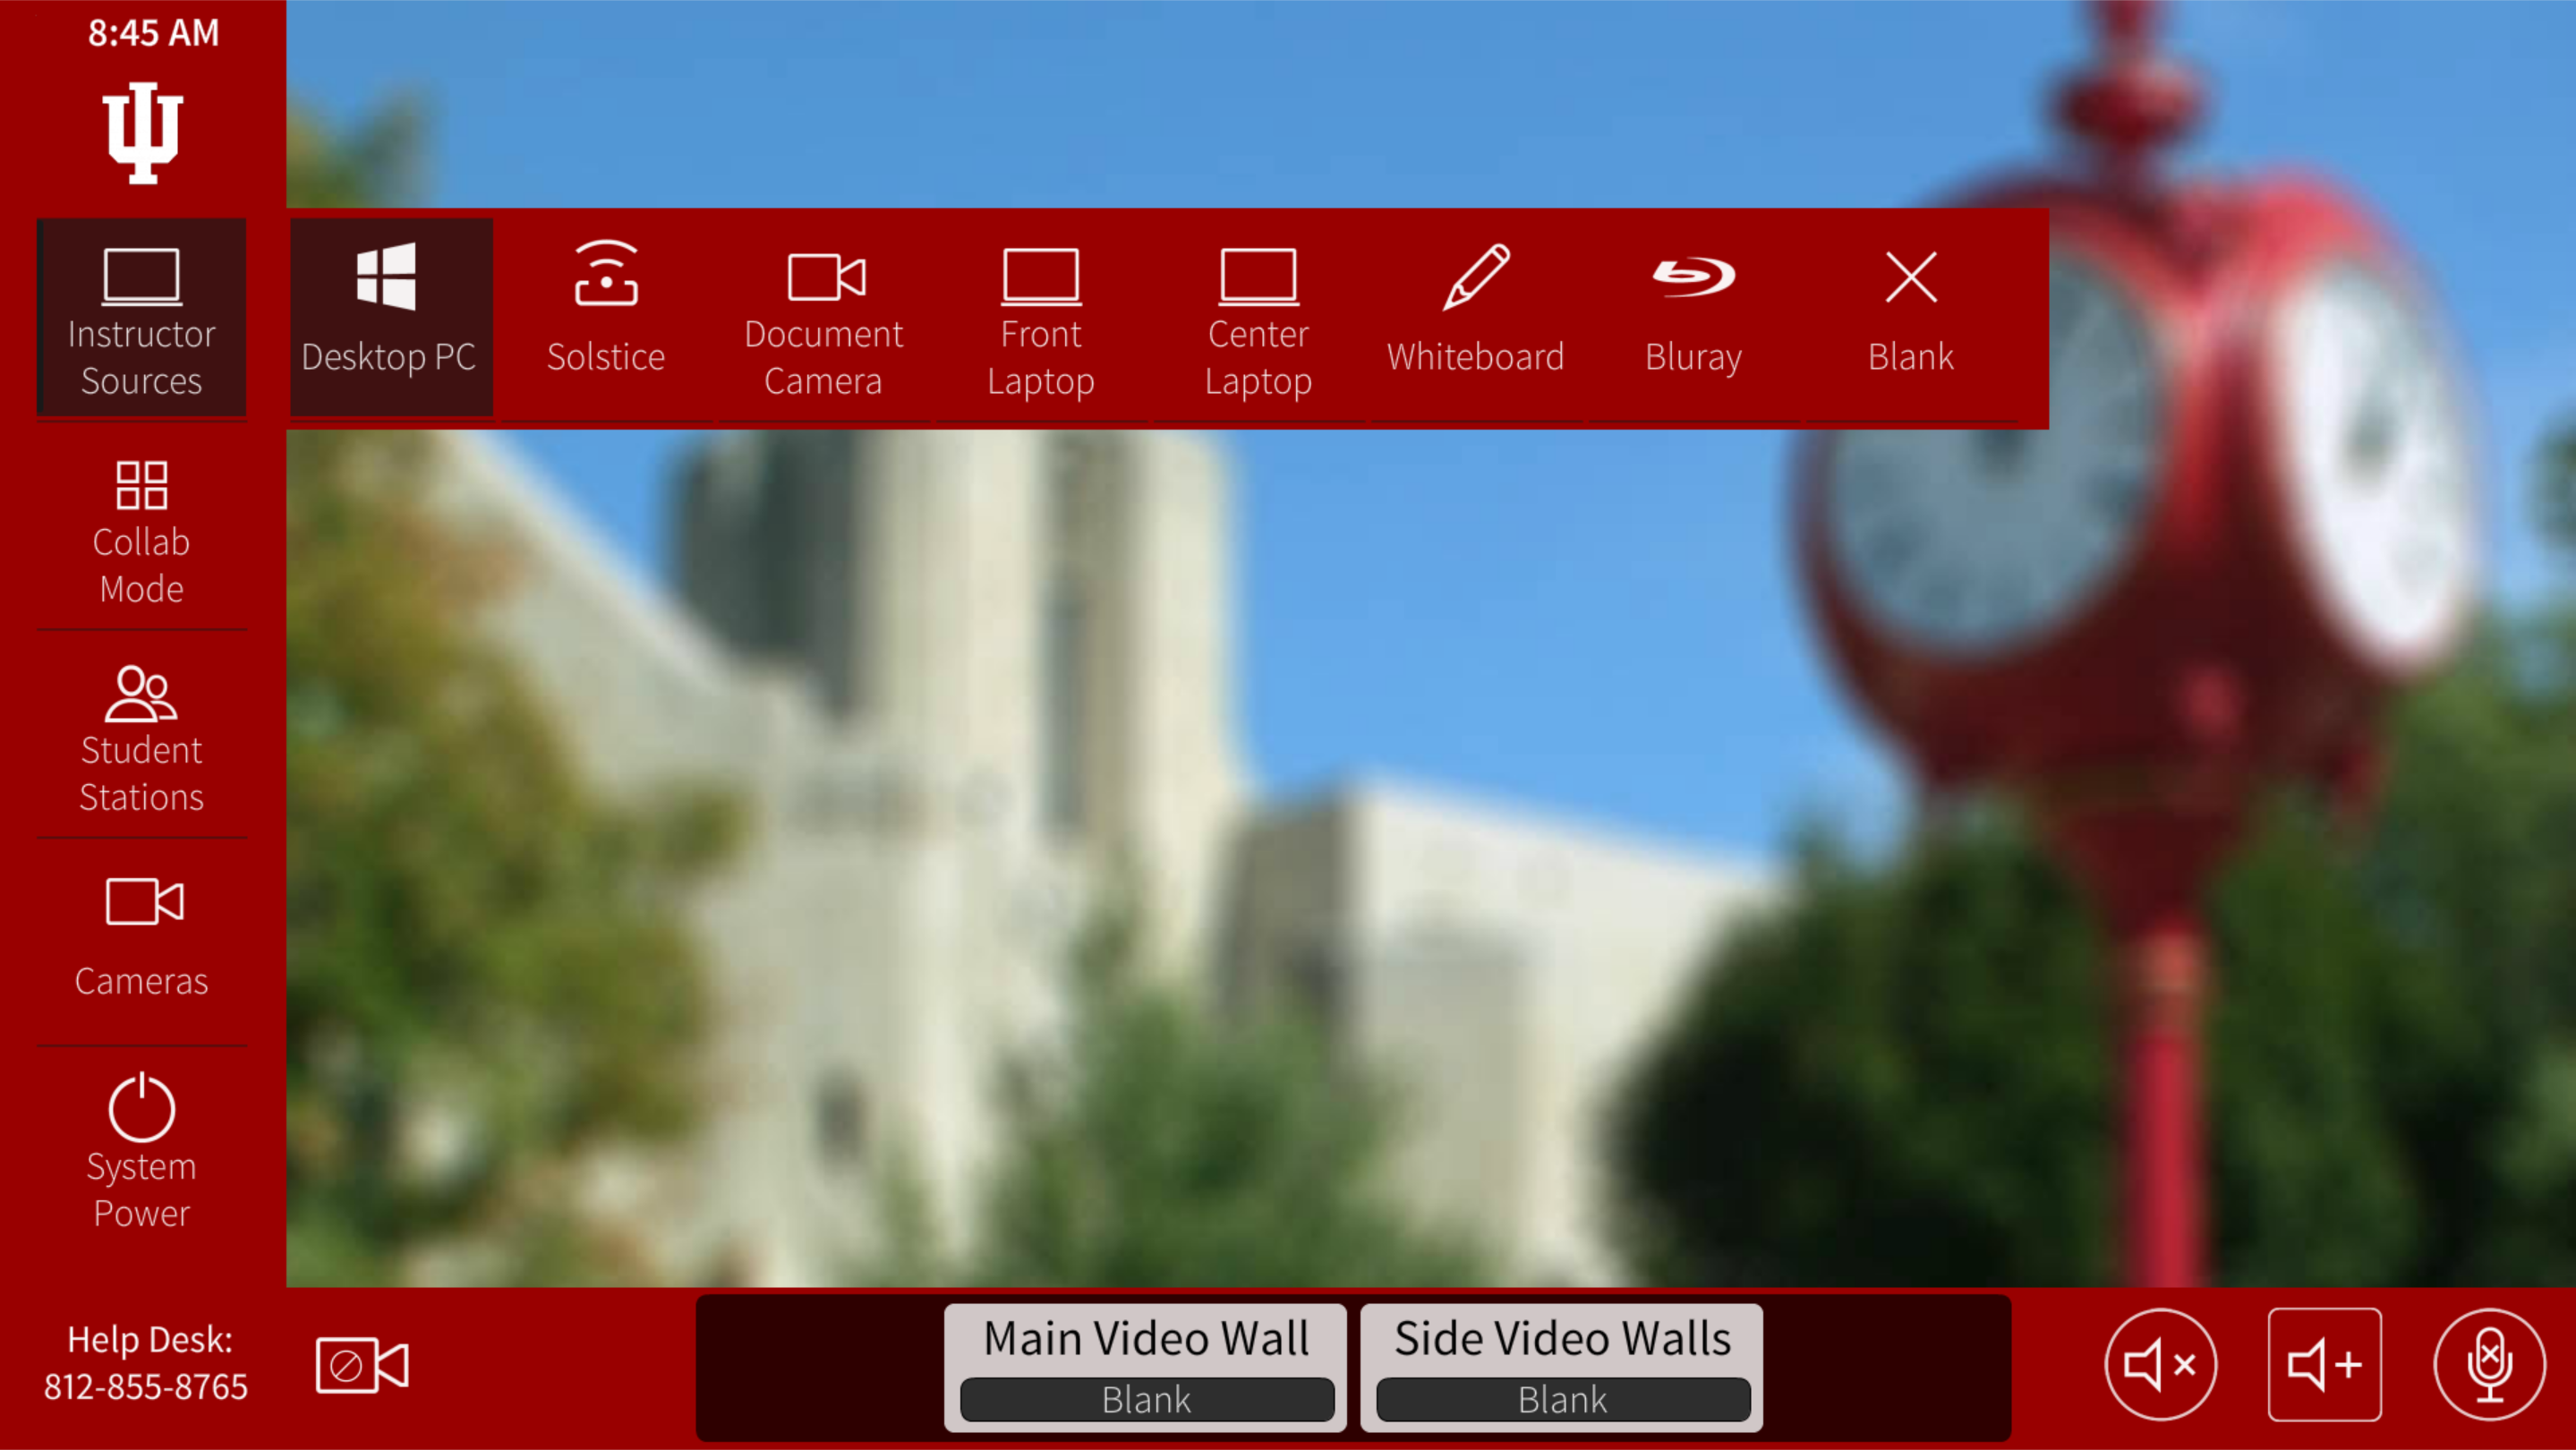 Instructor Sources
Selecting the “Instructor Sources” button shows many options of content to display. By selecting a source, a preview of the content will appear in the main “confidence monitor” portion of this display. To have this content appear around the room, select one or more destinations along the bottom touch bar.
- Desktop PC – This is the desktop PC provided in the classroom. Use your IU credentials to login to the machine. If you have USB content, or a USB device, you can connect those in the labeled ports found in the equipment tower (sits on the west wall of the classroom).
- Solstice – Selecting this source will display connection directions for users to wirelessly connect any device (laptop, tablet, phone) to share content. More information about Solstice.
- Document Camera – This will display the camera view from the document camera on the front instructor station. More on how to use this document camera.
- Front Laptop – You can bring your own laptop and choose to have a wired connection to display content. To display this source, first connect the laptop with the HDMI cable at the front instructor station.
- Center Laptop – To display this source, first connect the laptop with the HDMI cable at the center instructor station.
- Whiteboard – Instructors can use the whiteboard at the front of the room and choose to project the contents of what is written to any display source(s) around the room. Press the button to the right of the whiteboard to turn on the camera, select this source, and then choose where to display the image.
- Note: The camera will extract obstructions (instructor’s body) so content is not blocked by the person writing on the board.
- Blu-Ray – Select this source to play a Blu-ray or standard DVD. The player can be found in the equipment tower (sits on the west wall of the classroom).
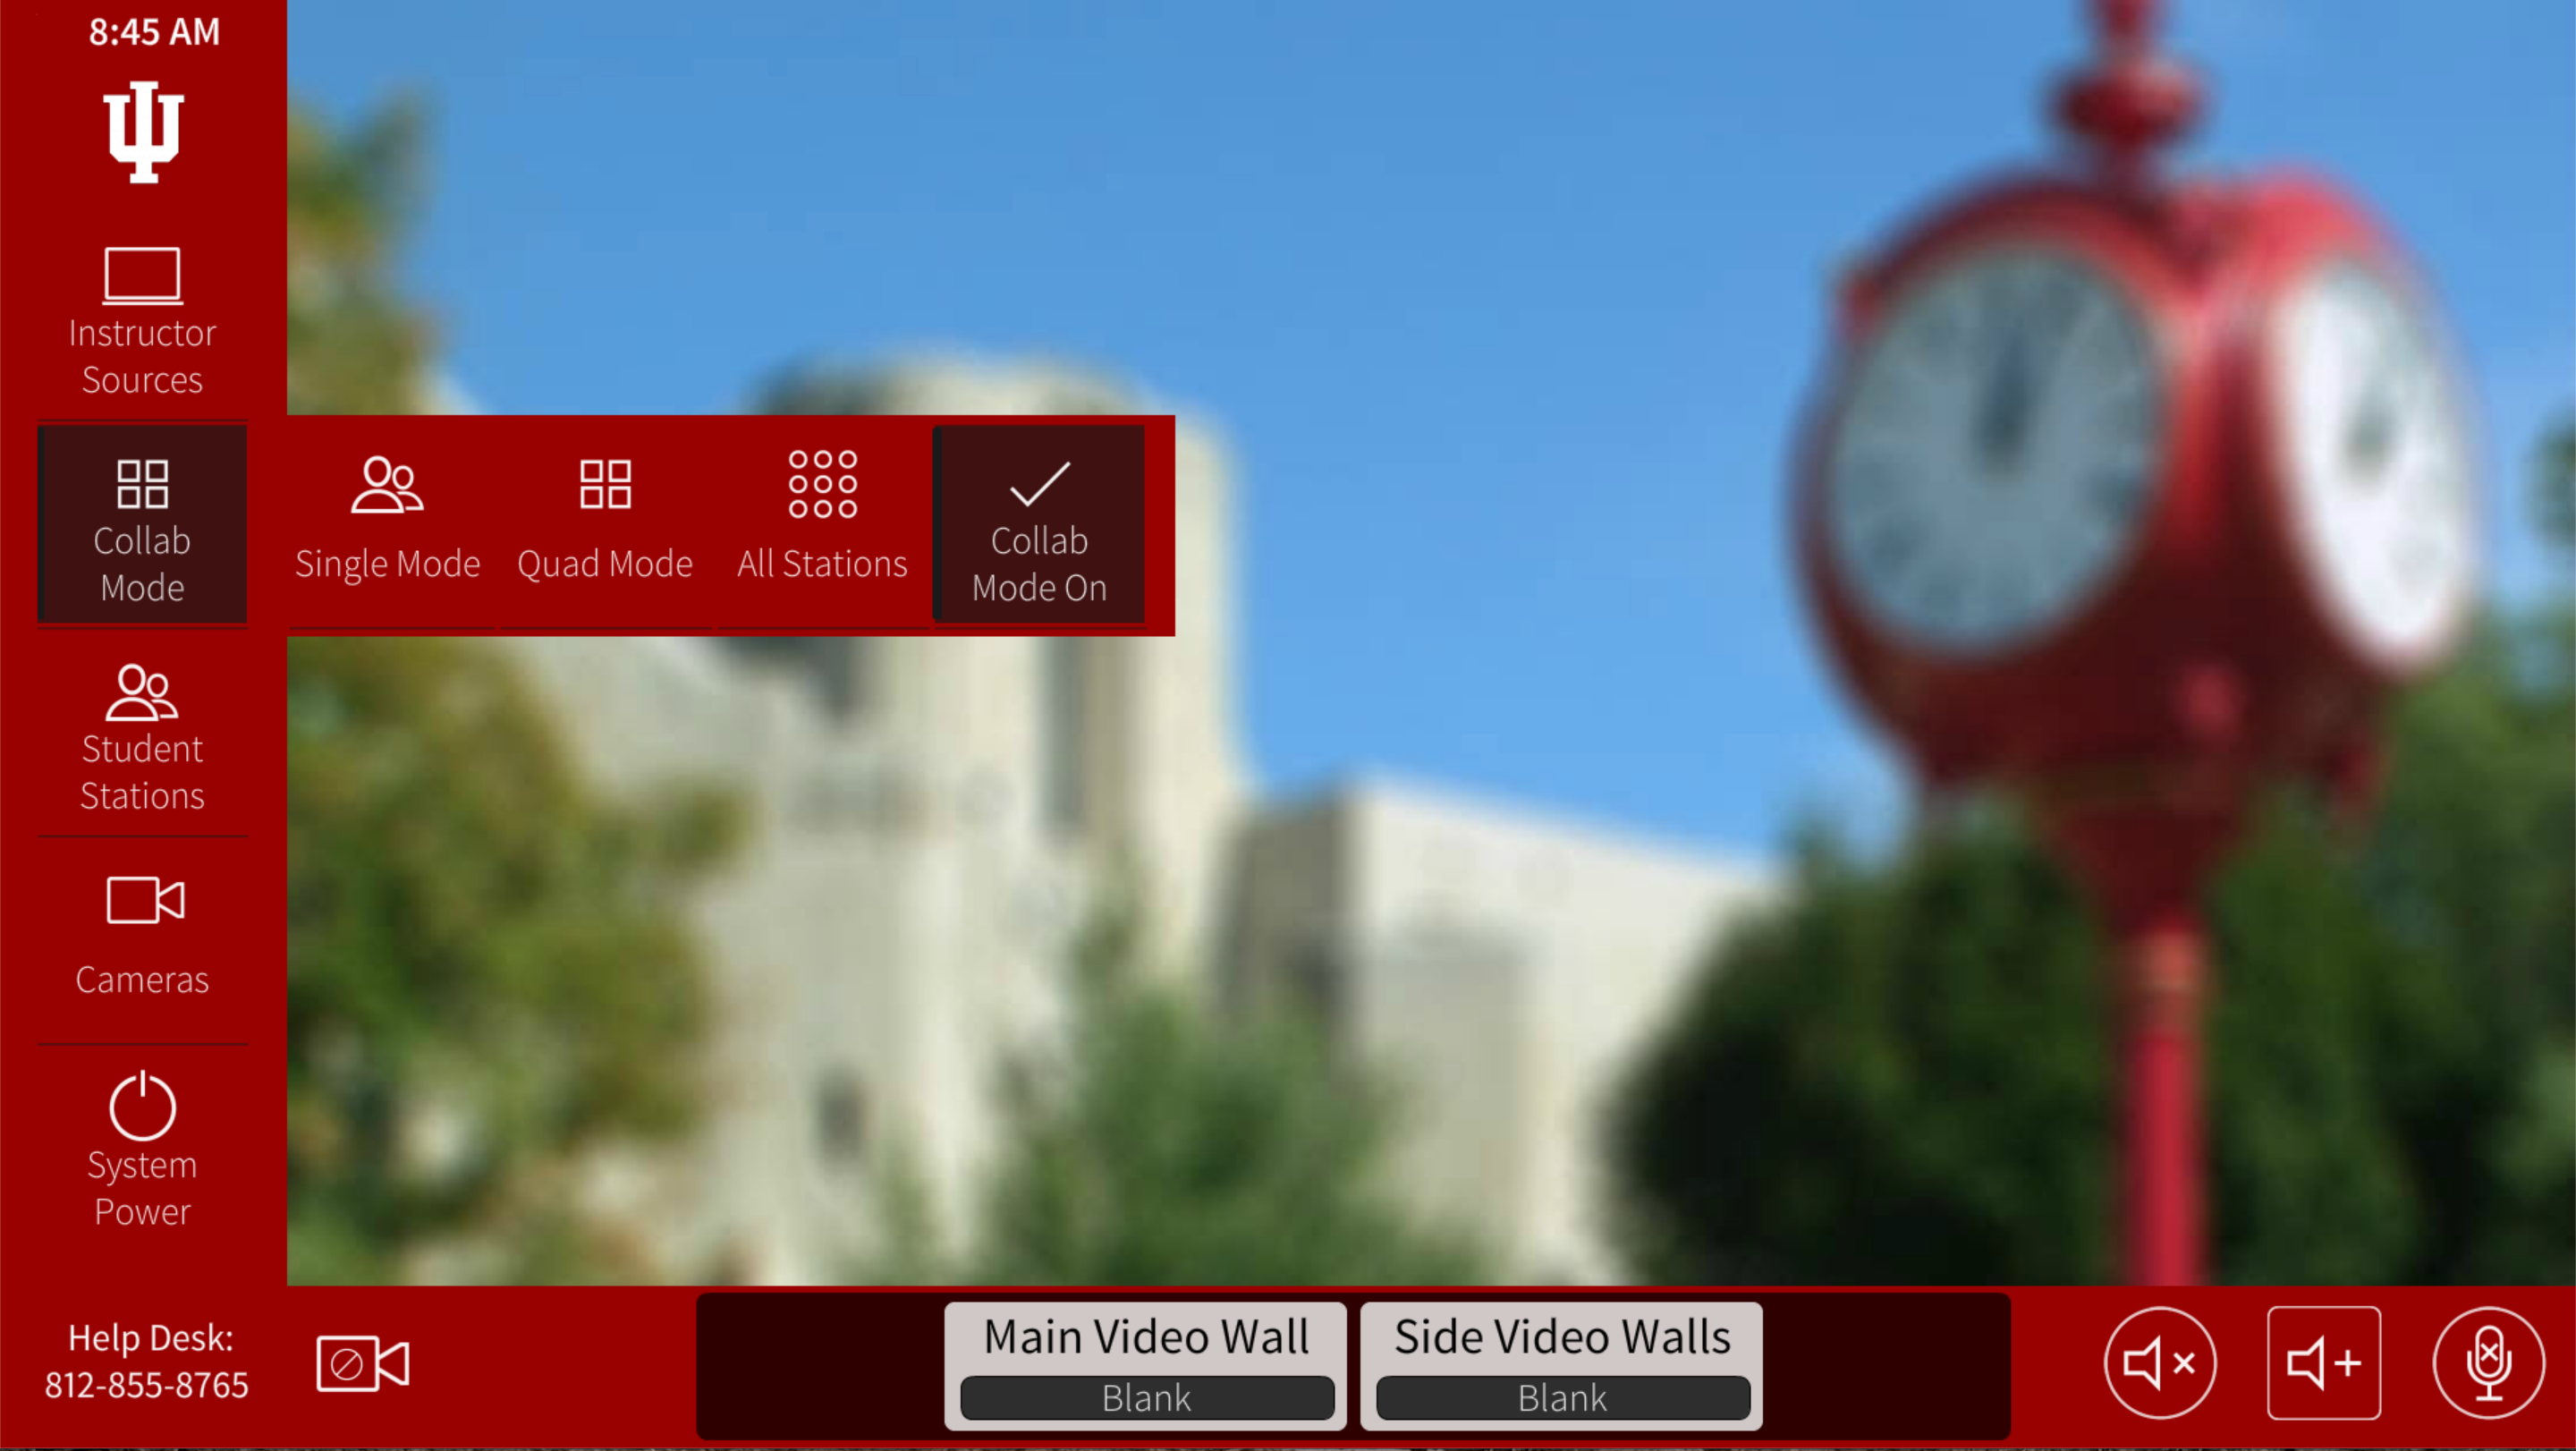 Collab Mode
Selecting “Collab Mode On,” will allow all student stations to have access to either the built in PC or to wirelessly connect their own device through Solstice. Once the collaboration mode has been turned on, instructors will notice the “Student Stations” destination will disappear from the bottom row. This is because it is now being used as a student source and therefore not a destination for additional content. By turning “Collab Mode Off,” student work/connection will not be lost, a different source will simply be routed to these displays. Turning collaboration mode back on will bring students back to the exactly where they were prior to collaboration mode going off.
*Note: Be sure to turn collaboration mode back on at the end of a class session so students can save any work and log out of the classroom PCs.
- Single Mode – Select this to choose one student table to display for the class to see (destination of main or side video walls)
- Quad Mode – Select this to choose four (4) student tables to display for the class to see (destination of main or side video walls). Good for comparison or showing exemplar work.
- All Stations – Select this to show a grid of all sixteen (16) student displays on the main video wall (will not display on side video walls). Good for activities where each table has a large image to share, or a one word answer (enlarged).
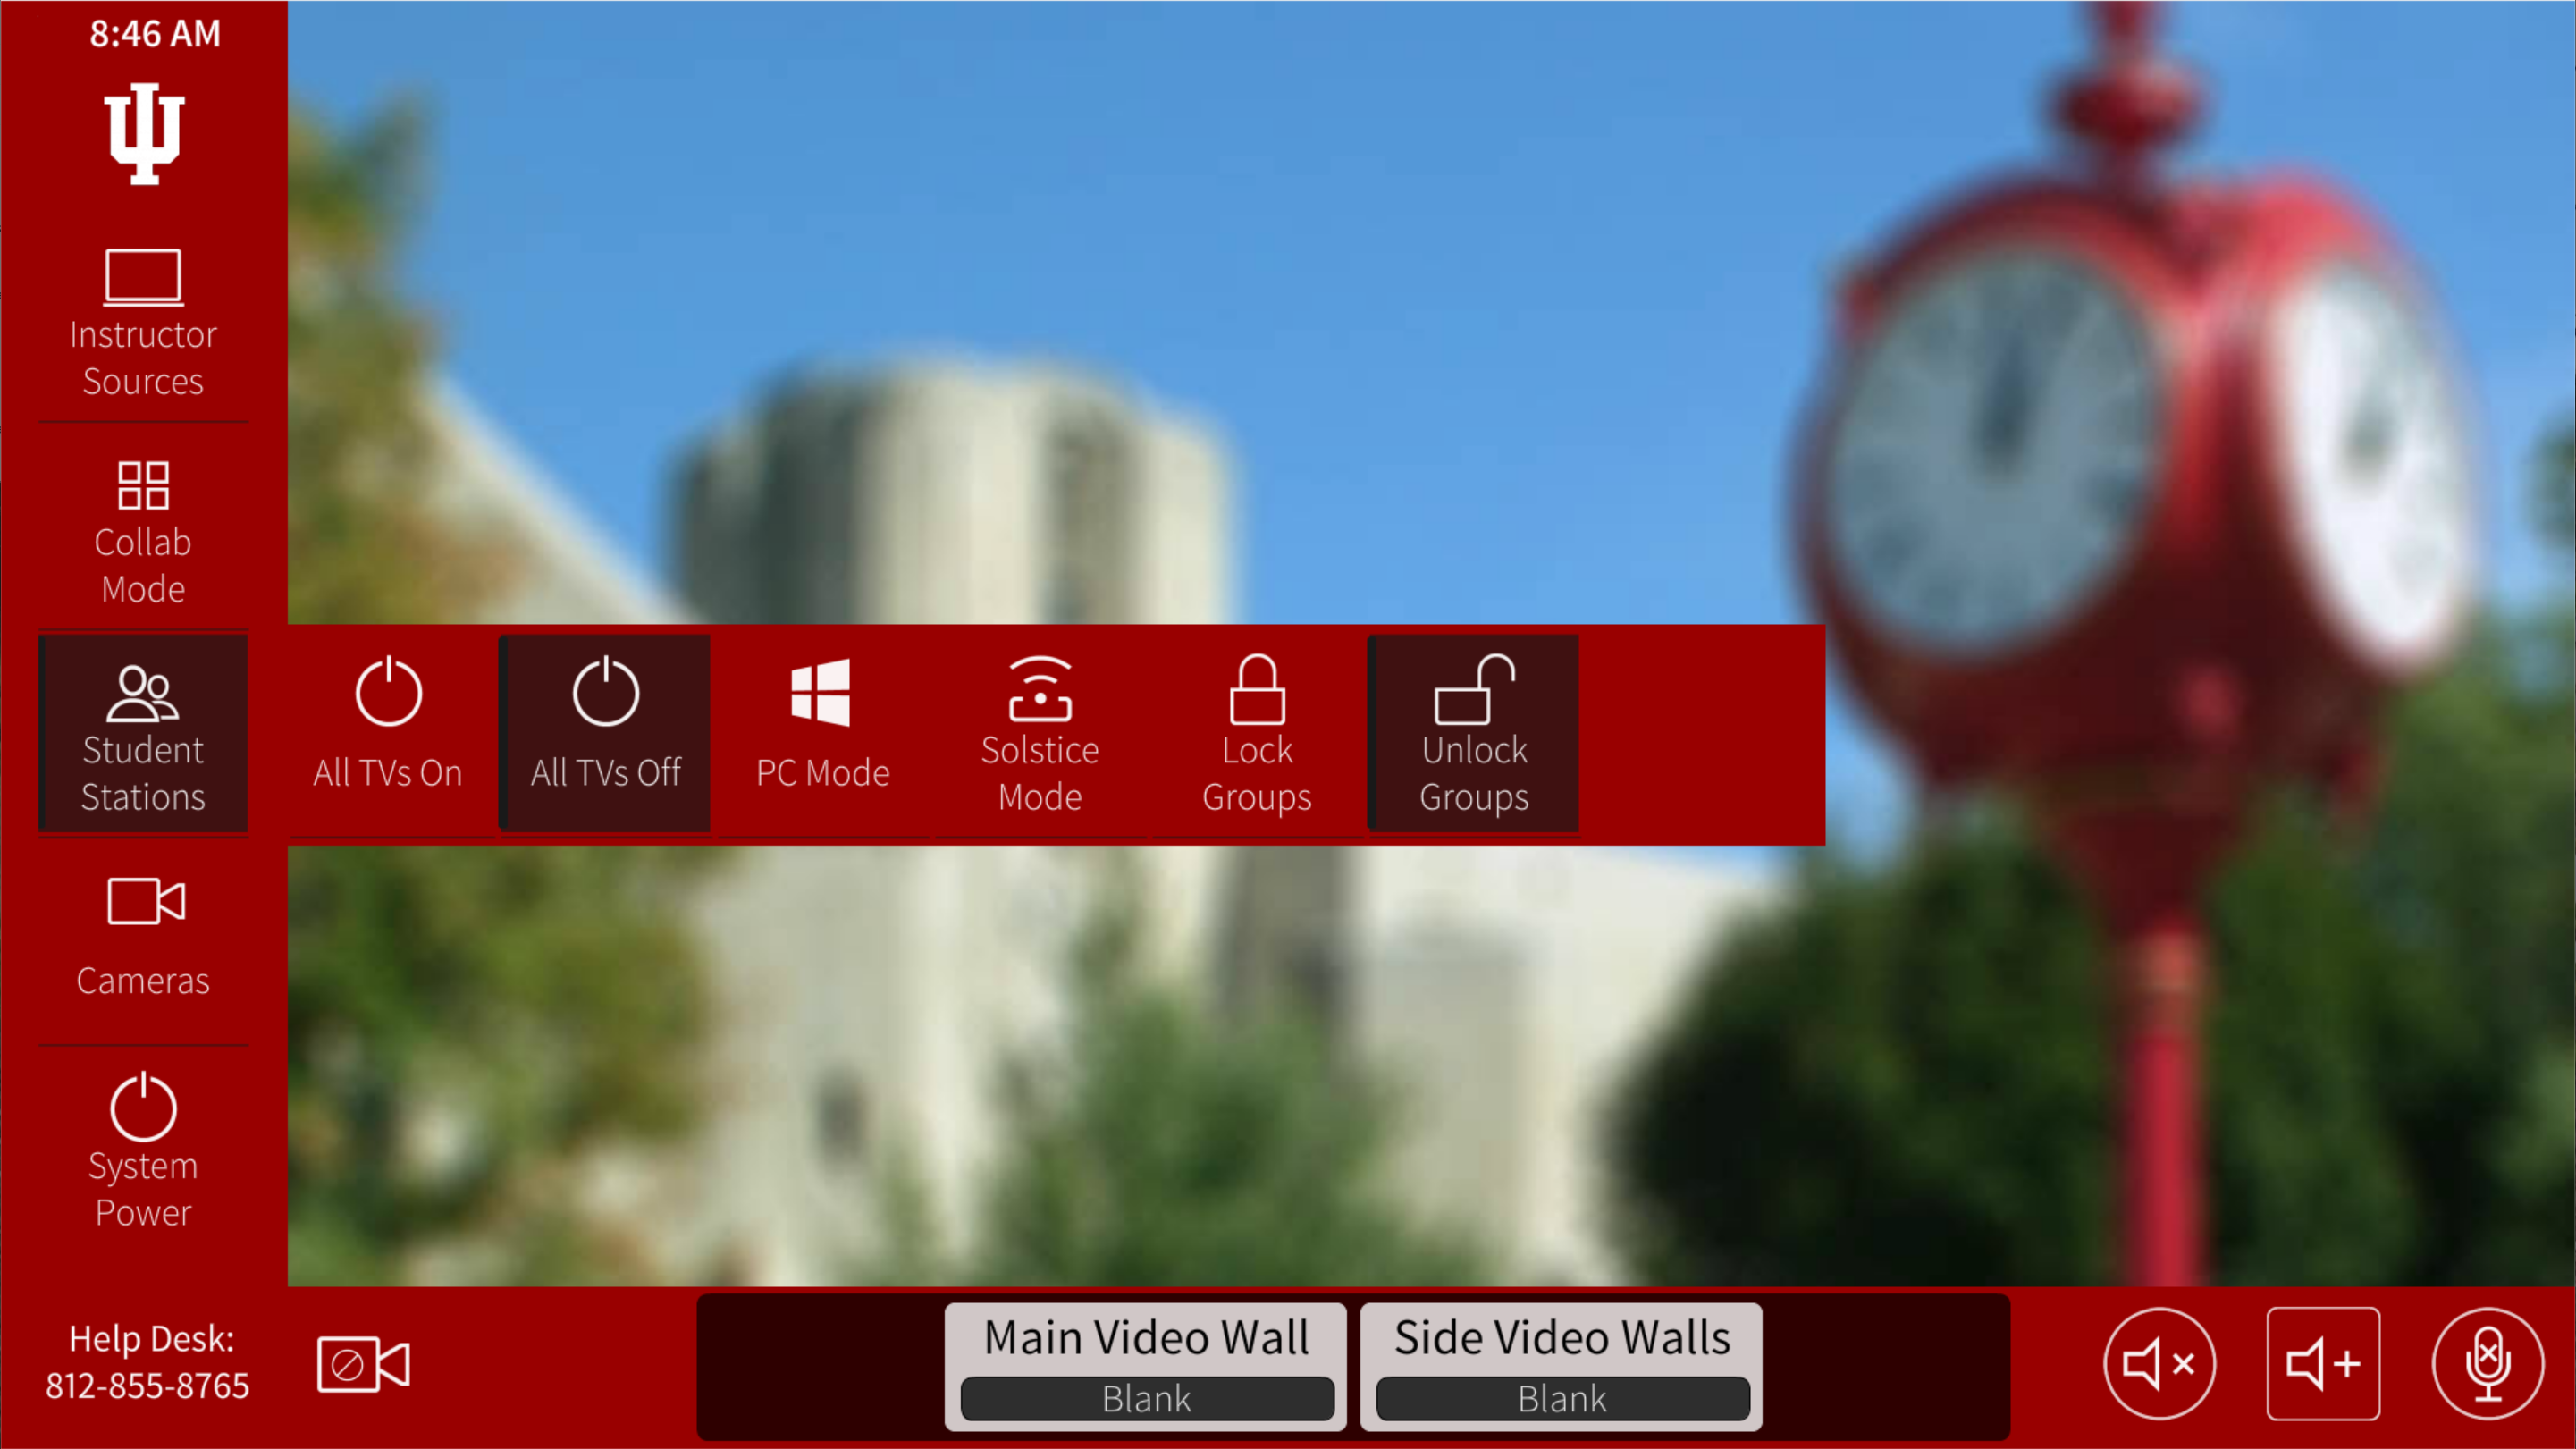 Student Stations
This is an instructor’s remote way to turn on all of the student stations for students to utilize. Instructors have the ability to force students to use either “PC Mode” or Solstice Mode” by selecting the mode followed by selected “Lock Groups.” Unless an instructor has a specific reason to do this, it is recommended to allow the students to choose what works best for them.
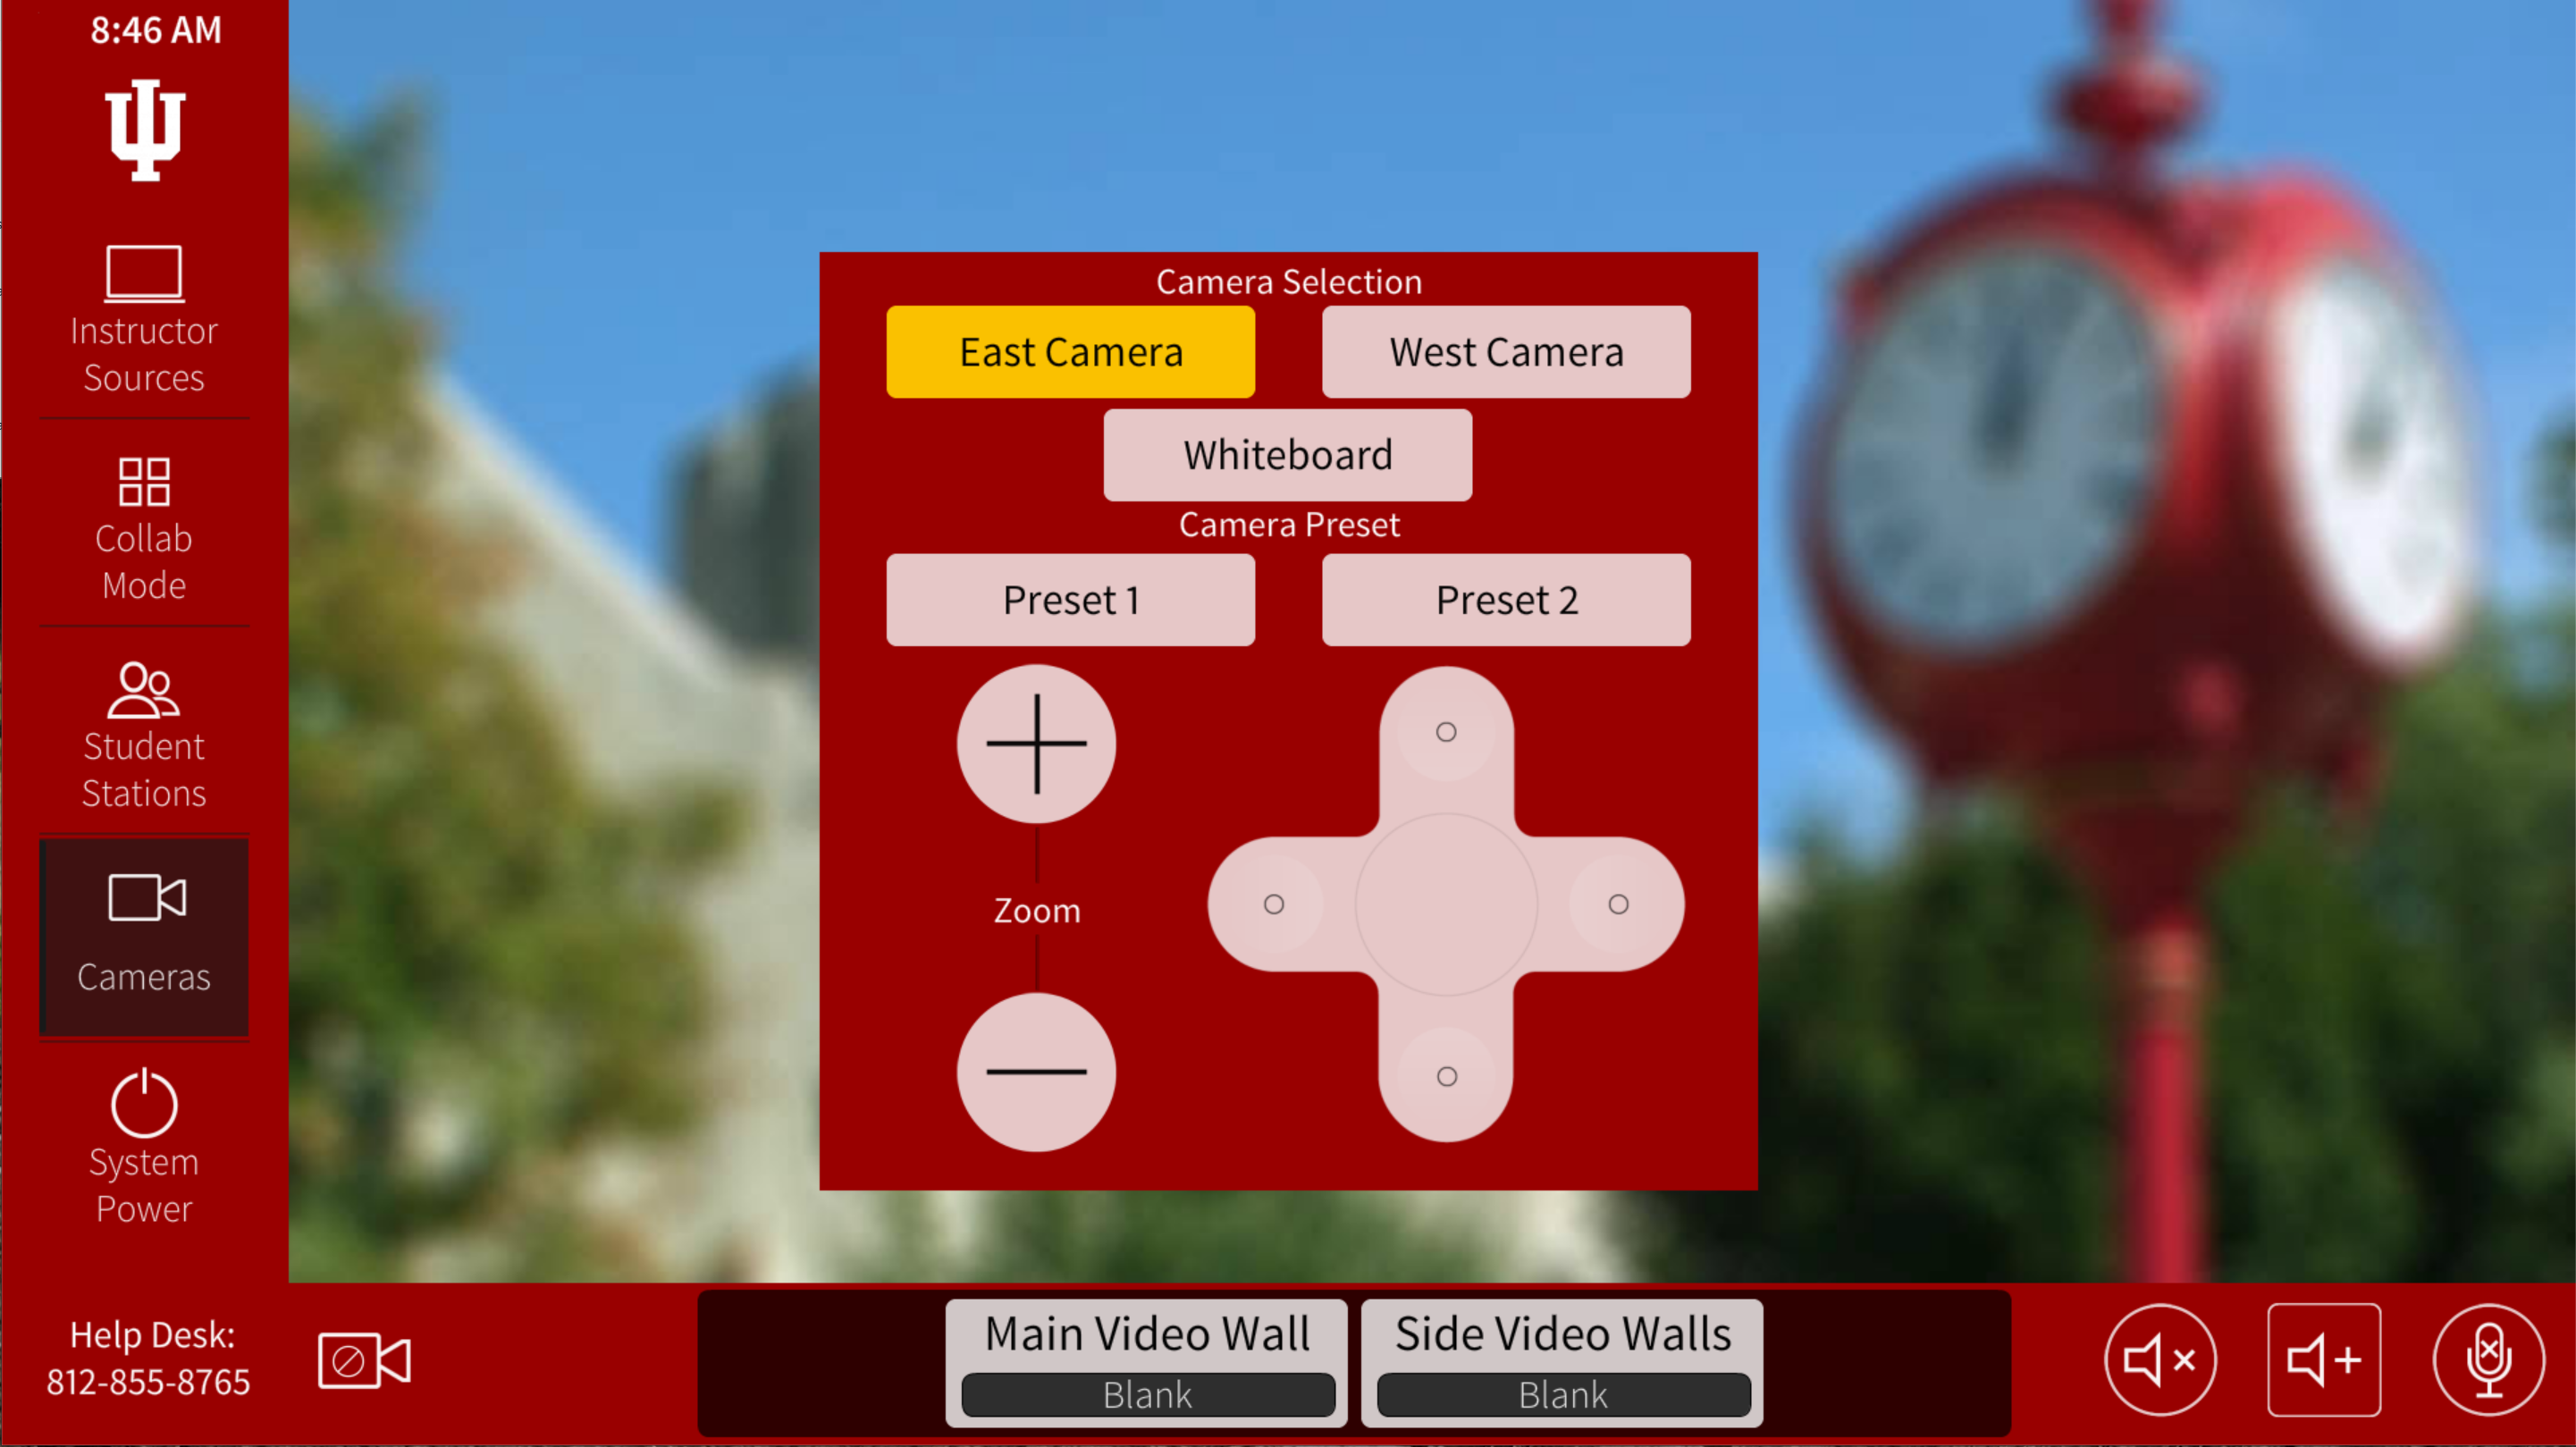 Cameras
This control panel allows the instructor to pan and zoom the classroom cameras.
If you would like an in-person tutorial on how to use the instructor control panels in Student Building SB015, see ALC Classroom Consultations to schedule an appointment.

