
29 Time Tracking
Time tracking is essential for all personnel on the eDS team. Time tracking allows managers to accurately bill clients, secure resources, strategize for future projects and initiatives, and monitor workload to ensure that no one becomes overwhelmed. This guide will show you how to track your time in Wrike and provide best practices for time tracking.
How to Track Time in Wrike
While it may be personally useful to track time in a spreadsheet or other program, Wrike is the official method of tracking time at eDS. This is because time tracking in Wrike allows reports to be generated by managers.
It’s important to understand that time can only be tracked at the task and subtask levels in Wrike, not at the project or folder level. You can note whether something is a task by the small post-it note icon that appears in Wrike.
Adding a Time Entry
To add a time entry in Wrike, follow these steps:
- Select a task to bring up the information pane to the right. In the task info pane, you will find the time entry tool underneath the custom fields, on the line that begins with “add subitem.” The time entry tool looks like a play button with numbers next to it and a small down-arrow used to pop the tool out to full size. Note that you will not see the time entry tool in the information pane for projects or folders, only for tasks and subtasks.
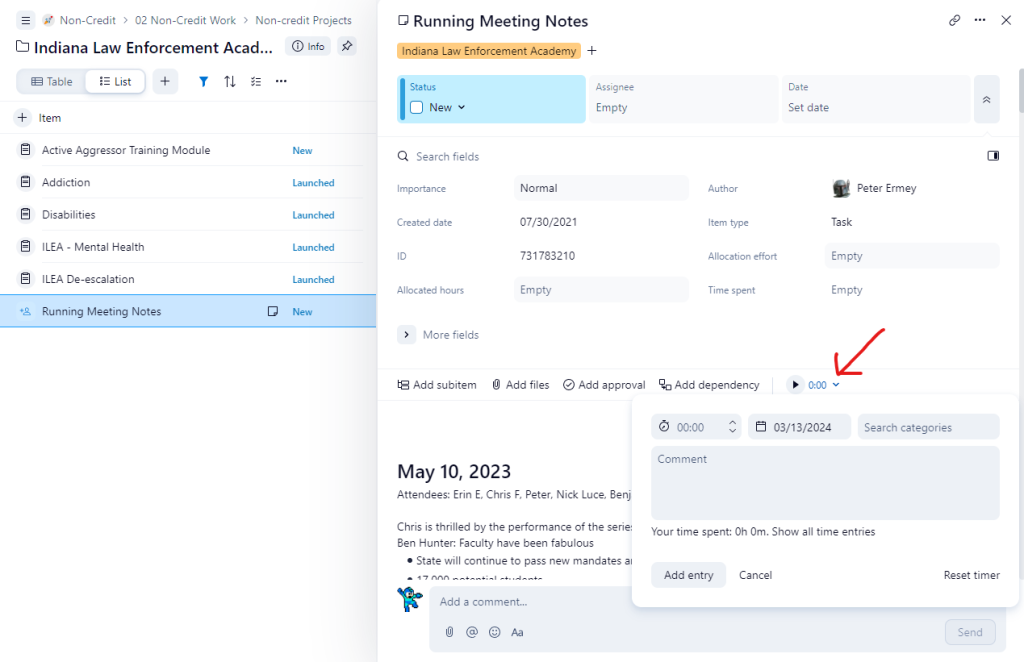
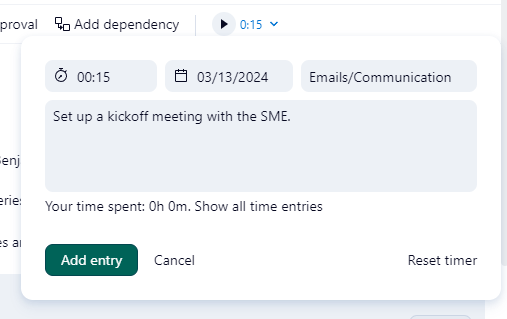
- Add a time entry to the task by clicking on the box next to the stopwatch icon. You can increase or decrease the time in 15-minute intervals using the small arrows, or you can click and type the hours and minutes into the box. You can modify the date in the box next to the calendar icon, and you can change the category of the time spent in the “search categories” box. Finally, there is a place to type your own comments. When you are finished, click “Add entry” to create the time entry. Note that you cannot exceed 24 hours in a given day, so tracking time as you go in Wrike is preferable to bulk entry.
- For additional entries, click to open the time tracking box and fill it out again with the new information.
Viewing the Timelog
In addition to adding entries, it can be helpful to see all of the time entries for a project. This can be done by viewing the timelog. The timelog holds all of the accumulated time entries for the tasks and subtasks in a project or folder.
You can access the timelog in one of two ways:
- From the time tracking tool in a task or subtask, click on the “show all time entries” link that appears next to “Your time spent.”
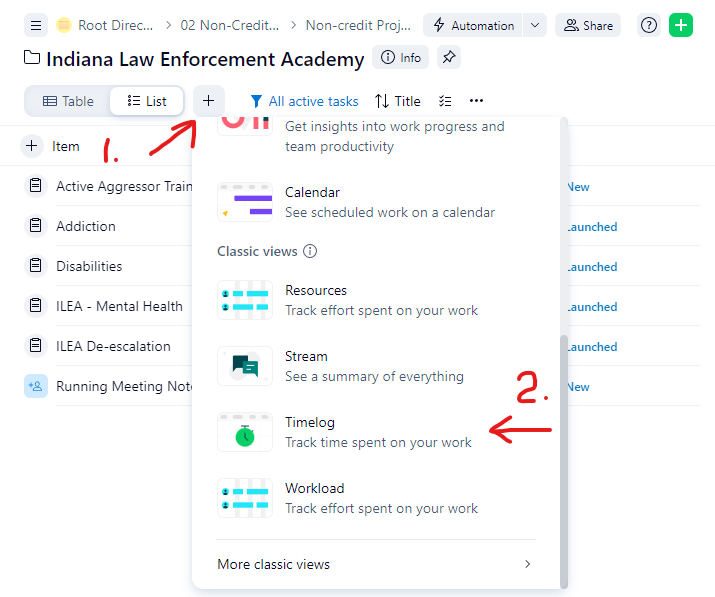
- From the folder or project view, click on the “Add view” plus button beneath the folder/project title and select “Timelog” from the options. Now you can switch to the timelog view anytime by clicking on the tab that is created in your views.
- From the timelog, you can view all entries, see the sum total of hours spent on the project, and even batch edit entries to change the date, time, or categories. This is a good place to go to add extra minutes to an entry or to make sure your time tracking looks correct.
Time Tracking Best Practices
In a busy work environment, it can feel like extra work to track time. Here are some best practices to help ease that burden and ensure that time tracking goes smoothly.
- Track as you go. Wrike best supports an approach where you enter tasks and then time track in them as soon as you are finished with the work. If there isn’t a task that suits the work you’re doing, then create one!
- Use the timer. You can click the “play” button on the time entry tool to start a timer while you work on a particular task. When finished, click the pause button to stop the timer, and then enter all of the regular information in the time entry tool and add the entry.
- Round up. Time is best tracked in 15-minute chunks. Round your time entries up to the next quarter hour.
- Use categories and comments. Each category is there to help you remember what you might spend time doing on projects. Make comments to help the entries make sense to you when viewing the timelog.
- Check the timelog. Set up a regular time to check the timelog for each project, such as at the end of the day or end of the week. Edit the entries in the log to account for extra time spent.
- Create tasks for time tracking. Create specific tasks designed to track time in a project, rather than tracking by each individual Wrike task. These could be modeled after the time tracking categories, or you could use one task called “[Name] [Project] – Time Tracking.”
- Remember the purpose. Your time tracking entries don’t need to be granular or accurate down to the day and minute. The purpose of time tracking is to strategize and balance workloads, not to micromanage. If you fall behind, it’s ok to add some bulk entries on whatever dates to catch back up. The most important thing is the sum total of hours spent on the project!