
Corrugated Clamshell
Treatment Criteria
The corrugated clamshell box is a utilitarian enclosure used most often for housing books that are heavy, large, and/or need structural support. We use B-flute or E-flute corrugated board that is acid-free and buffered to maintain an alkaline-side pH.
Tools Needed
MEASUREpHASE
Utility Knife
Crimper
Bone Folder
Ruler
Glue Brush
plain (non-spring type) wooden clothes pins
Materials Needed
Archival Corrugated Board
PVA
Waxed Paper
Scrap pieces of board, any type
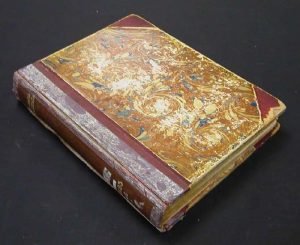 |
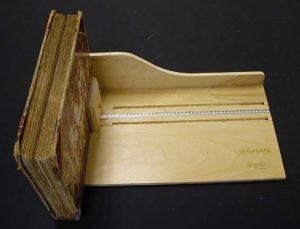
Here we have a typical candidate for this enclosure, a book that is large, heavy, and needs structural support. |
 |
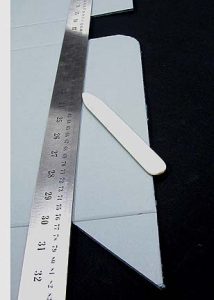
The first step is to measure the book, using the MEASUREpHASE. First, the length is measured… |
 |
…then the width, |
 |
…then the depth. |
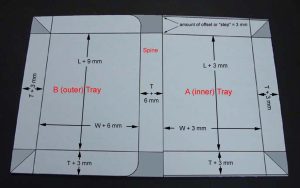 |
Here is a plan showing the measurements, cuts, and creases for this enclosure. The formulas for the measurements correspond to the measurements of the book, L representing the length, W the width, and T the thickness. It is advisable to compute all the measurements needed, before doing any cutting, in order to have a set of measurements from which to work. For the sake of simplicity, we will say our book measures: * 30 cm (300 mm) wide (W), by * 40 cm (400 mm) long (L), by * 10 cm (100 mm) thick (T).So, all the individual measurements we need to calculate are:W + 3 mm = (300 mm + 3 mm) = 303 mm or 30.3 cm W + 6 mm = (300 mm + 6 mm) = 306 mm or 30.6 cm L + 3 mm = (400 mm + 3 mm) = 403 mm or 40.3 cm L + 9 mm = (400 mm + 9 mm) = 409 mm or 40.9 cm T + 3 mm = (100 mm + 3 mm) = 103 mm or 10.3 cm T + 6 mm = (100 mm + 6 mm) = 106 mm or 10.6 cmThe formulas for the overall dimensions of the piece of board needed are: Length: [L + 2T + 20 mm] Width: (2W + 3T + 30 mm) |
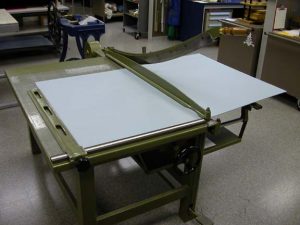 |
So we cut a piece of board that measures 62.0 cm x 93.0 cm. This is done in the board shear. |
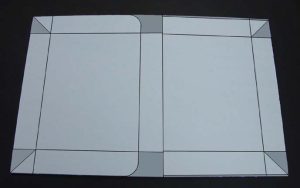 |
Here the cuts and creases are marked out on our board. The shaded areas are the pieces that will be cut away and discarded. We are ready to cut it out; this cutting will be done with a razor knife and straight edge (except for the curved cuts, which will be cut freehand with the knife). |
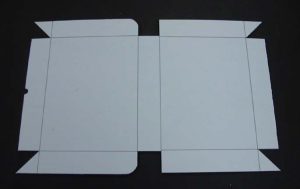 |
Here we see the piece cut out. Note that a small semi-circular notch can be cut out of the side that will be the front of the lid. |
 |
And here it has been creased. |
 |
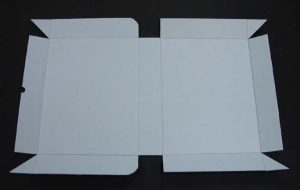
Most of the creases can be done with the crimper, aka creaser. Creases can also be made with a straight edge and a bone folder. |
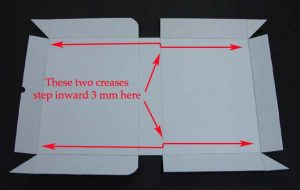 |
The two long creases indicated by the red arrows cannot be executed in the crimper, because they are not straight lines; they make a 3 mm inward dog-leg at the junction of the A tray and the spine. |
 |
Consequently, these two creases have to be made with a bone folder, following a straight edge. |
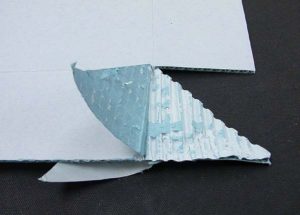 |
Next, we delaminate the board of the triangular pieces at the corners. This just amounts to peeling back the face paper, leaving the corrugated inner core exposed. A thin bone folder works quite well for this. |
 |
The inner core is now cut away, leaving only the two outer layers of face paper. Great care is taken to avoid cutting the face paper. |
 |
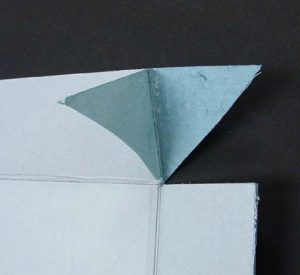
Straight PVA is applied to the inner surfaces of the face paper, the two adjacent side walls are folded upward 90 degrees into “box position”, and the glued up face paper is spread apart to receive the square-ended full-thickness wall. The face paper envelopes the full-thickness wall and is affixed to its outer surface. |
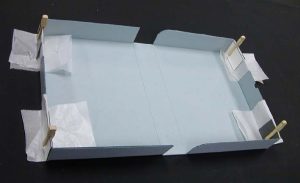 |
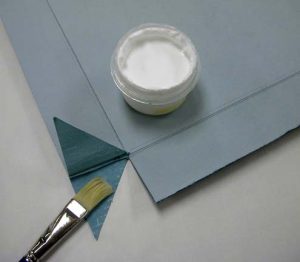
The corners are covered with wax paper and are clamped with wooden clothes pins or spring clamps (either works quite well). If necessary, scraps of board are employed to increase thickness and cause the clothes pins to pinch more tightly. |
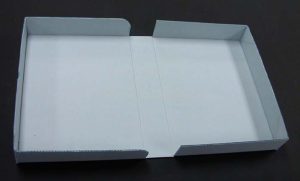 |
Here we see the finished box. Faintly visible in the far right hand corner is the triangular face paper (the inside one). The face paper donor walls are at the top and bottom in the picture; those the paper is glued to are at the left and right ends of the box. |
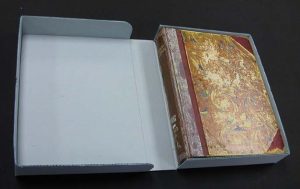 |
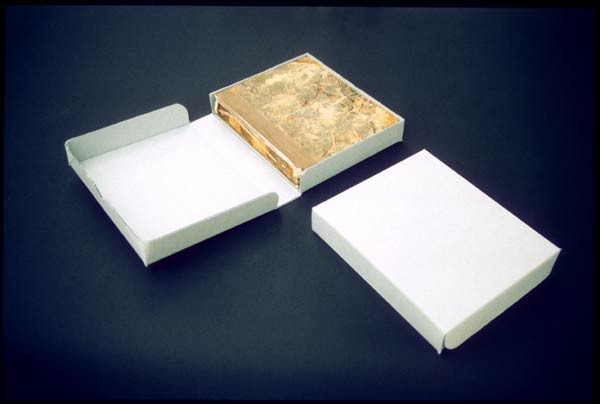
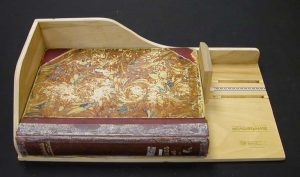
This image shows the finished box in use, housing the book. |
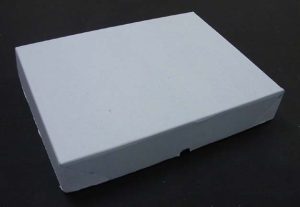 |
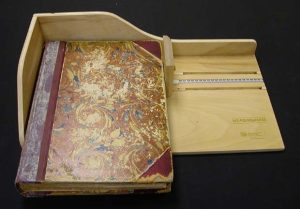
And here is a view of the box as it looks when closed. |