
Double-Fan Adhesive Binding
Treatment Criteria
Adhesive-bound books, either paperback or hardcover, are normally sent to the commercial bindery for re-binding. However, we do perform an in-house adhesive binding. It is most often performed when one of the following is true of an adhesive-bound book:
- Someone is waiting to use the book. Certain high-use books qualify as well. The bindery is on a 4-week cycle, so when time is a factor, we do the work in house. Adhesive-bound books re-bound in-house can be returned within a couple of days.
- The book has insufficient gutter margin, for which reason it can not be sent to the commercial bindery. The bindery we use sets the minimum allowable margin at 3/8.”
Tools Needed
Guillotine
Board Shear
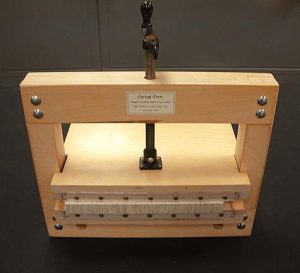
Adhesive Binding Press
Adhesive Binding Vise
Flat Press Boards
Weights
Utility Knife
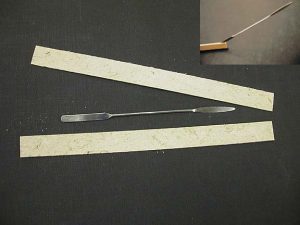
Ruler
Glue Brush
Bone Folder
Microspatula
Materials Needed
Binder’s Board
Book Cloth
PVA
PVA Mixture
Newsprint or similar scrap paper
Reemay or Waxed Paper
Stretch Cloth
Mylar
Specially-made 3-leaf endsheets or
Text Weight paper
Hinge Cloth
 |
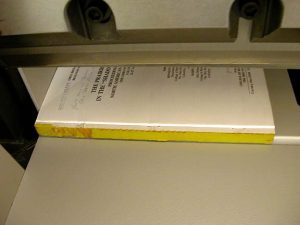
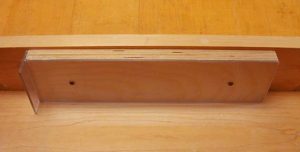
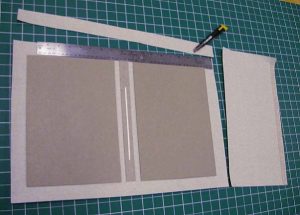
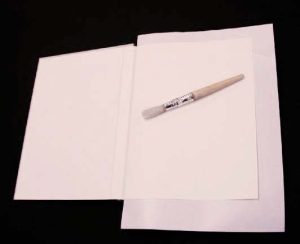
Here we have a typical adhesive-bound book, showing the flat spine and no evidence of folios being grouped into signatures. The book is a paperback, and as it has seen considerable use, it will be put into a hardcover case. |
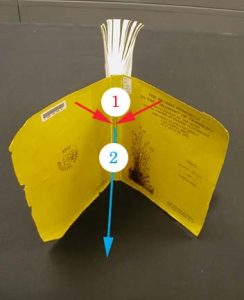 |
First, the old cover is removed from the book. This amounts to “over-opening” the book, to the point that the front and back covers meet (indicated by red arrows), then giving the cover a sharp pull in the direction indicated by the blue arrow, while holding the text block firmly in the other hand. |
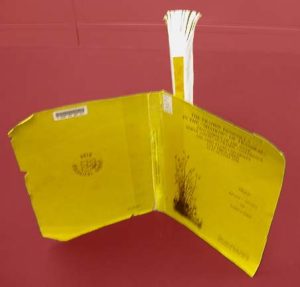 |
Here we see the book with the cover removed. |
 |
As is sometimes the case, the adhesive binding of this book was supplemented by staples, which were driven sideways through the text block. |
 |
The staples are removed. |
 |
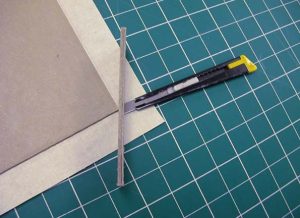
The outermost tip of the text block is sliced off, using the guillotine. Here it is ready to be chopped. |
 |
The main objective of this step is to remove the extreme edge of the spine, where the text block is held together by adhesive, and to leave the text block a stack of loose sheets of paper. Since this book has generous gutter margin, we are able to take a liberal amount (about 1 cm) off the text block and still leave plenty of margin. In the case of this book, this puts the cut inside the perforations left by the staples. Though not absolutely necessary, eliminating these perforations is desirable, if for no other reason that that they can make the task of jogging up the text block more difficult than it needs to be. |
 |
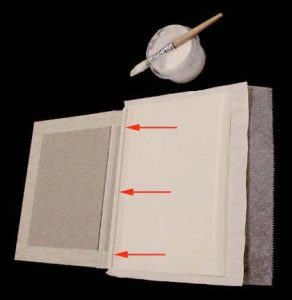
Special 3-leaf end sheets are used for the quarter-joint adhesive binding, and we will take a leaf-by-leaf look at one. We will proceed just as turning the pages of a book, beginning from the usual* “front cover up” orientation. As shown here, this endsheet is the one that will go at the front of the book. What is showing here is the side of the first leaf that will be glued to the inner surface of the board. This leaf and the second one will be glued together to form a double-thickness paste-down. The approximately ¾” wide white strip on the left is hinge cloth. It wraps around to the back side of the end sheet, where it overlaps by only about ¼”.
* All bearings given are those which apply to Western books; the orientation of some Eastern books is the reverse. |
 |
On turning the first leaf, we see by the fold at the spine edge that we are at the center of a folio. |
 |
On turning the next leaf, we see that both leaves of the folio are now to our left, and that the last leaf, the one on the right, is a single sheet attached to the folio by the strip of hinge cloth. |
 |
And finally, on turning this final single sheet leaf, we see the short wrap-around of the hinge cloth on the back side of the endsheet. |
 |
For the sake of illustration, here is a schematic drawing of the endsheet. The red area is of course the hinge cloth. So we have a folio followed by a single sheet. This is the order going outside to inside. That is, the endsheet that will go at the back of the book will be a mirror image of the one pictured. The folio and long side of the hinge cloth will be on the right; the single sheet leaf and short side of the hinge cloth will be on the left.
The endsheets are trimmed to the length and width of the text block and placed as described. A good tip to remember is that the wide part of the hinge cloth goes on the outside (visible). |
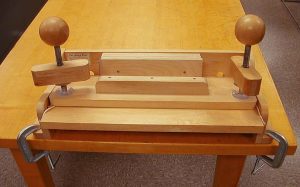 |
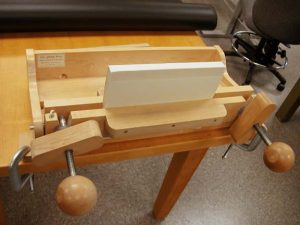
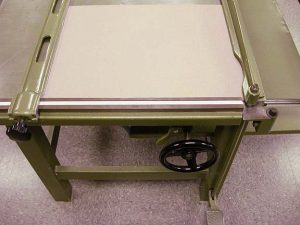
Shown here is a special vise used for double-fan adhesive binding. The next few illustrations show how it works. |
 |
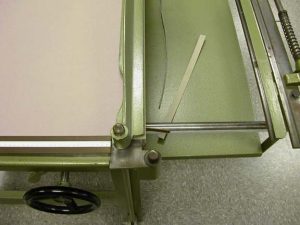
This is a close-up of the jogger, against which the text block is jogged up both lengthwise and laterally. |
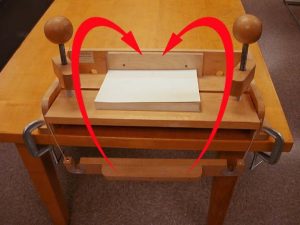 |
This jogging is the first step. Once jogged up, the drop clamp is brought up (red arrows) and placed on top of the text block. |
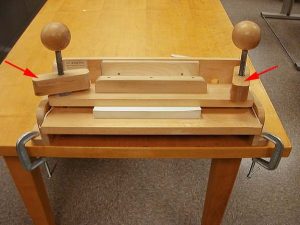 |
The screws are now tightened down tightly, and the text block is held securely by the drop clamp. Pressure needs to be sufficient to render the text block incapable of shifting or otherwise moving. Incidentally, the large wooden balls on the ends of the screws are just handles (very comfortable ones). The parts indicated by the red arrows are the actual nuts which turn and tighten. |
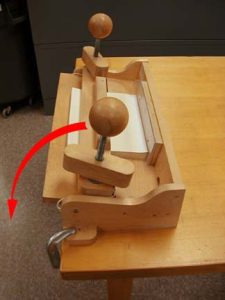 |
Here we see the side view of the clamped text block. We are going to rock the carriage 90 degrees in the direction indicated by the red arrow. |
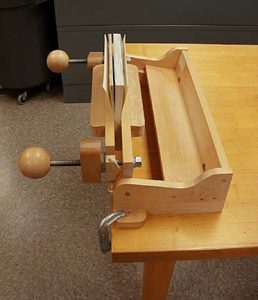 |
The edge of the book that is now pointing up is the spine edge. This swiveling action is the great feature of this made-for-the-purpose vise; as you can see, it makes the spine work all very handy to do. |
 |
The super is now cut to size. The length is that of the text block, the width is such that 1″ overlaps on both sides. |
 |
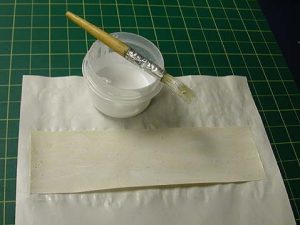
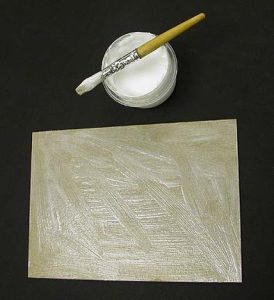
The following two steps are the source of the term “double fan.” That is, the text block is “fanned” (bent) over, in the direction of the red arrows. (And yes, there would normally be a hand somewhere in the vicinity of where the center red arrow is located.) Straight PVA is applied liberally to the spine edge. It works well to designate a container of PVA to this treatment and to store it in a container with the lid left slightly ajar (not wide open) for a couple of weeks, so as to allow it to thicken. Of course, the environment in which this is done needs to be one where mold is not a problem. |
 |
Now the text block is fanned in the other direction, and again PVA is applied liberally to the spine edge. |
 |
The super is now glued up. This needs to be done after the text block, as it tends to start curling right away on contact with the adhesive. |
 |
The super is centered both ways on the text block and raked down firmly and thoroughly with the edge of a bone folder. Substantial amounts of excess PVA will squeeze out from under the super. Once the excess has been removed, the super is worked with the usual burnishing action of the bone folder, i.e., it is rubbed vigorously with the flat side of the folder. |
 |
The text block is now removed from the vise and sandwiched between sheets of wax paper, Tyvek, Reemay, Mylar, or anything stick-resistant and laid on a flat surface. If doing a batch of these, they can be placed spine edge down with a piece of stick-resistant material wrapped around the spine and “stacked” horizontally, the batch being sandwiched between a wall on one side and a board and a weight on the other. |
 |
A board and weight are placed on top. The text block is left to dry until the next day. |
 |
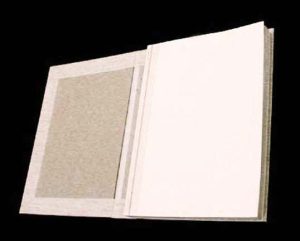
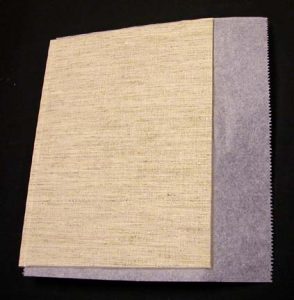
The text block is now ready to case in. (Notice that the wide part of the hinge cloth is on the outside (visible). |
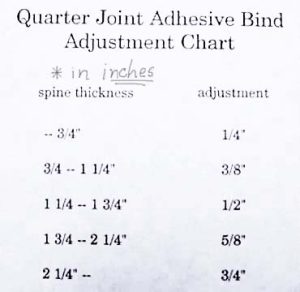 |
This chart is used to determine the amount of “adjustment,” which amounts to the distance from the spine edge by which board edge is recessed. |
 |
Our example is found to be between ¾” and 1 ¼” in thickness, so its adjustment is 3/8.” Thus, a line is drawn 3/8″ from the spine edge on both the front and back sides of the text block. |
 |
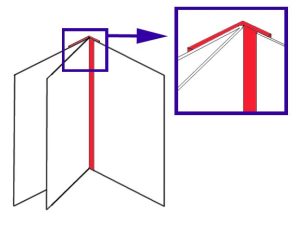
We now make the first measurement for the boards of the case. The length measurement of the text block is taken and to it is added 6 mm, to yield 3 mm of square at the top and bottom edges.
The width measurement for the boards of the case is arrived at by measuring from the line we drew 3/8″ in from the spine edge, and to that measurement adding 3 mm for the square at the fore edge. |
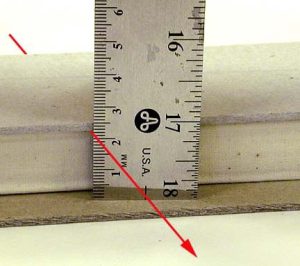 |
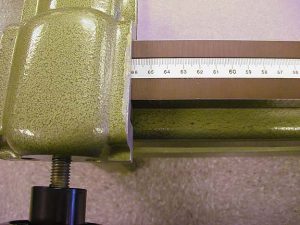
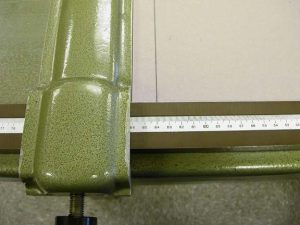
The thickness measurement is now taken. The outer extremes of the spine can offer somewhat unsure visual definition, so it is sometimes helpful to take a more positive reading by sandwiching the text block between two pieces of board as shown. As this is a hard spine binding, we will need a piece of board the width of the spine and the length of the case. In our example, the width of the spine measures 2.2 cm. |
 |
We now move to the board shear. We first cut a piece of board the length of the case and wide enough to yield the width of both boards of the case, plus the spine piece. Cutting a piece of board only 2.2 cm wide could be a problem, but we will do it both easily and accurately, using the following technique. |
 |
As mentioned, we need a piece 2.2 cm in width, and we have already cut our piece of board to the length of the case. We now turn the piece 90 degrees in the board shear as usual, to cut the boards of the case and the spine piece to their widths. The fence is moved to the extreme left of the board shear’s bed (or removed), and the piece of board is positioned so it is flush with the cutting edge. Now the fence is nudged up to the piece of board and moved to the right, so that the board just overhangs the cutting edge. We begin to look on the ruler for the first even measurement we come to. We stop at 66.2 cm. Why is 66.2 cm an “even” measurement? Because it is easy to subtract 2.2 cm from it. |
 |
We find that stopping at 66.2 cm leaves this much board overhanging the cutting edge. We cut it off. |
 |
The fence is now moved to 64.0 cm, and the board is again cut. |
 |
This yields a piece 2.2 cm wide and the same length as the rest of the case, exactly the dimensions the spine piece needs to be. |
 |
Here we move the fence back to its starting location and look at what has been done. We see that the spine piece bridges the space from 64.0 cm to 66.2 cm, for a total of 2.2 cm.
The boards of the case are now cut to width. |
 |
We delaminate the board of the spine piece, reducing it to approximately half its thickness, which makes for a better fit of text block to case. To start, a microspatula is embedded in the edge of the board at the center point of its thickness (inset). With a prying motion, the two halves are separated far enough to be held with the fingers and pulled apart. The board is usually pretty cooperative. |
 |
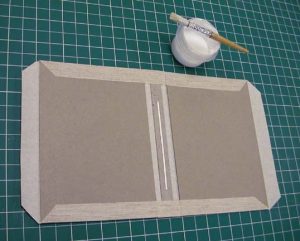
If the book is from a collection that uses security strips, it is at this time that the strip is put into place on the spine piece (on the side that will be facing the text block). It will thus be fully concealed. |
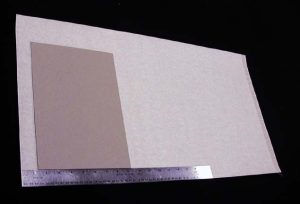 |
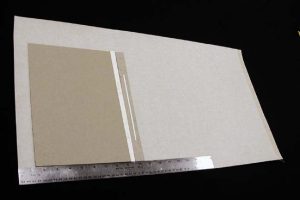
The cloth is now cut for the case. One board is put into place (2.5 cm from one edge and from one end) in the picture, to show that the cloth is cut at least 5 cm longer than the length of the boards and wide enough to cover both boards and the spine piece, and to allow for the two 3/8″ offsets and two 2.5 cm turn-ins. These length and width measurements are minimums; excess cloth in either direction is fine. |
 |
The first board is glued up with PVA mixture. As you can see in the illustration, the adhesive is applied to the board, not the cloth. |
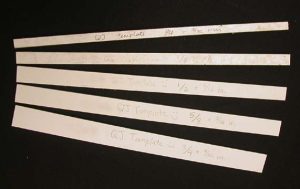 |
We have made templates which further adjust the measurements prescribed by the chart. We found it a good working formula to add 3/32″ to the chart’s measurements. |
 |
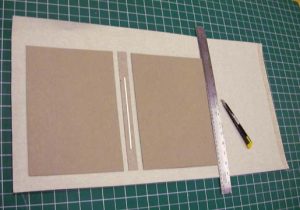
The board is positioned 2.5 cm from the bottom edge of the cloth and 2.5 cm from the end of the cloth at the left. We now use the appropriate template from those in the previous image. The template merely serves to consistently and accurately determine the space between the boards of the case and the spine piece. The spine piece is glued up and put into place. The pieces are aligned against a straight edge at the bottom. |
 |
Again using the spacer template, the last board is glued up and put into its place on the cloth. And again, the pieces are aligned against a straight edge at the bottom. |
 |
The excess cloth is now trimmed down to a 2.5 turn-in all around, using a razor knife and a 2.5 cm wide steel ruler. Here the excess width is trimmed off. |
 |
And this image shows the trimming of the excess length. |
 |
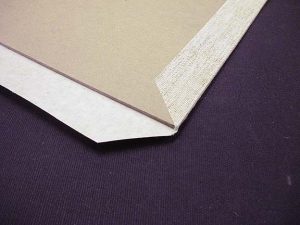
The cloth is cut at approximately 45 degrees at each corner. The cut is made two board thicknesses out from the corner of the board, using a template of that thickness to guide the knife. |
 |
Here is another view of the template in action. |
 |
Here is the case with all four corners cut. |
 |
We now begin to glue down the turn-ins. The top and bottom are done first, followed by the left and right ends. As the cloth is folded over, it is gathered toward the center to create just a bit of excess. This helps the cloth to make the steps around the board edges and spine piece. The cloth is worked rigorously around these edges with a bone folder. |
 |
The cloth is worked over the board edges with a bone folder at the ends, as shown, and the cloth is smoothed down with the folder over its whole length. The turn-ins of the right and left sides are merely folded over and smoothed down. The case is now ready for the text block. |
 |
First, the text block is positioned in the case so that there is the proper amount of square (about 3 mm) at the top, bottom, and fore edge. The case is now opened out flat, making sure the text block does not move. |
 |
A piece of newsprint is placed under the outermost leaf and a piece of wax paper under the newsprint. |
 |
The leaf is about to become the paste-down. Its entire outer surface is glued up with PVA mixture, but only over to the 3/8″ line we drew earlier. As soon as this is done, the newsprint is removed, leaving only the wax paper. |
 |
The book is closed, then opened, and the paste-down is smoothed down to the board with the fingers. The book is turned over and the other side is done in the same manner. |
 |
The joint is defined by carefully running the edge of a bone folder down the spine edge of the boards. The angle of the bone folder should be very low; nearly parallel with the surface of the boards. If the pointed end is used for this, it is very easy to tear the cloth. If that happens, the case is ruined and must be started over. |
 |
The book is placed in a standing press overnight. |
 |
Newsprint is placed under the outermost leaf and the outer surface of the leaf is glued up, using PVA mixture. |
 |
Again, the book is closed, then opened, and the leaf is smoothed down with the fingers. This procedure is now followed at the other end of the book, and we are finished with our work on the book. The only thing remaining to be done is to add or re-attach any labeling. This would include the spine label, barcode, call number label, etc. |
 |
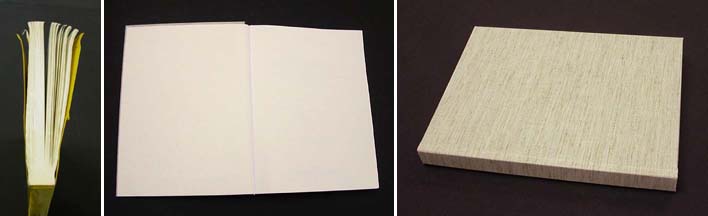
And here is the finished book. |
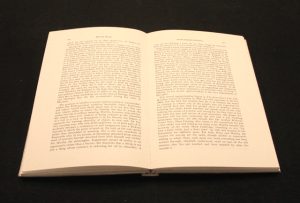 |
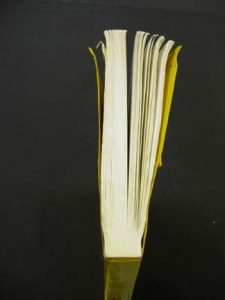
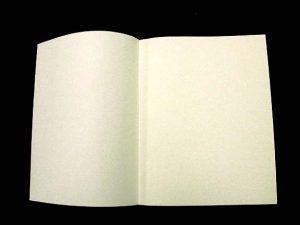
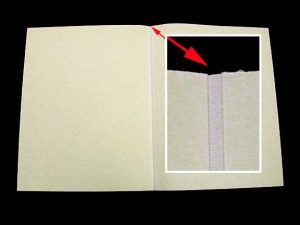
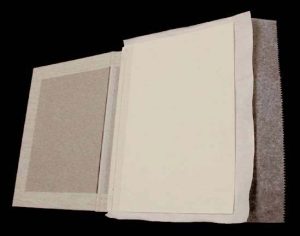
As noted in the criteria, one condition for double-fan adhesive binding candidacy is a minimal amount of gutter margin. As can be seen in this illustration, this treatment yields a text block that opens flat, allowing such margin-deficient books to be readable. In fact, no gutter margin is really necessary. Text can actually be adjoining at the junction of the two opposing pages; the book can still be read. |
 |
Having been made structurally sound once again, the book is ready to circulate. |