
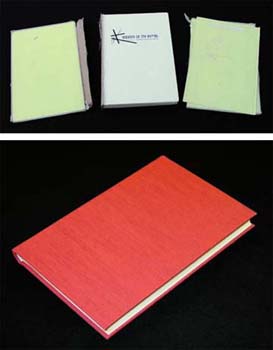
New Case
Treatment Criteria
Text block is of stitched construction
Structure, materials, and condition of text block suitable for re-binding, but …
Case not suitable for further circulation, due to wear and/or damage, and …
Case to text block attachment not intact, super torn (any, at all), and sometimes …
Boards are completely detached
Tools Needed
Finishing Press
Standing Press
Utility Knife
Scissors
Glue Brush
Awl
Bone Folder
Needle
Microspatula
Materials Needed
PVA Mixture
Methyl Cellulose
Text Weight paper
Newsprint or other scrap paper
Waxed paper
Linen Thread
Cotton Backliner
Hinge cloth
 |
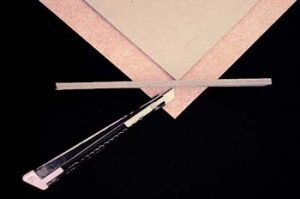
First, the text block is removed from the case by appropriate means. When the two are not totally detached from each other, this involves cutting the super. Any loose pages that stay with the case are either cut or merely pulled out and tipped back on to the text block. |
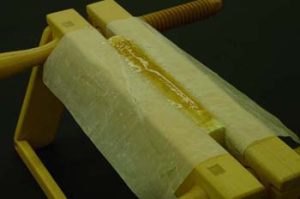 |
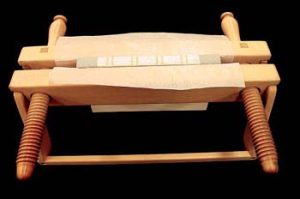
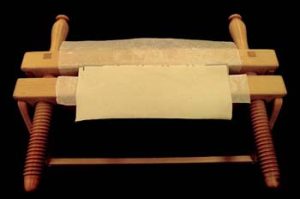
The text block is placed in a finishing press, masked with waxed paper, and a coat of methyl cellulose is applied to the spine. Methyl cellulose dissolves hide glue and some modern adhesives. It is left on the spine for about 10-20 minutes, before removal (which amounts to careful scraping with a microspatula) is attempted. Sometimes a second application/scraping cycle is necessary.
If the adhesive used in binding the book looks like plastic, other means of removal will usually have to be employed. One method for removing plastic adhesives is to melt them off with a heated microspatula. This method requires adequate ventilation (a fume hood is ideal for this). Another method involves planing the adhesive off with a sharp chisel. However, using this latter method to clean the spines of stitched text blocks without damaging the stitching requires much practice, considerable skill, and great care. |
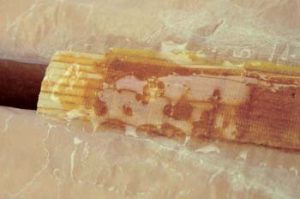 |
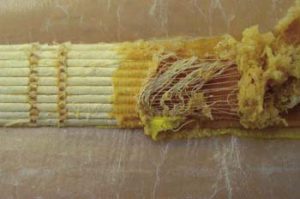
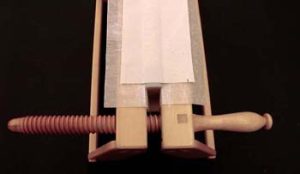
Here we see a close-up of the old super and adhesive we will be removing, and … |
 |
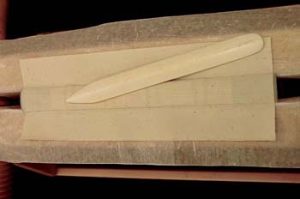
… in this close-up, we see the removal in progress. Shown in layers for illustration, we see the old super, the old adhesive, and the clean text block. |
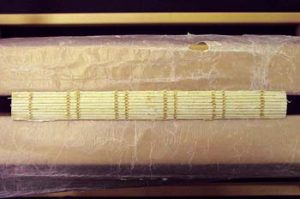 |
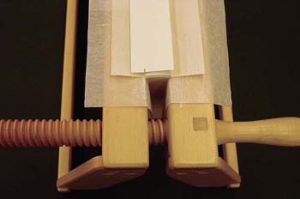
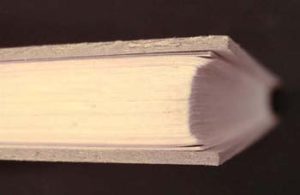
And here we have the cleaned text block. |
 |
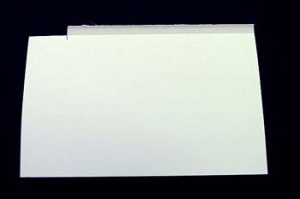
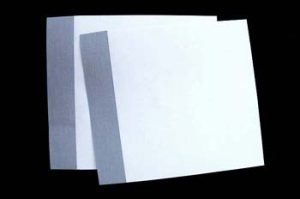
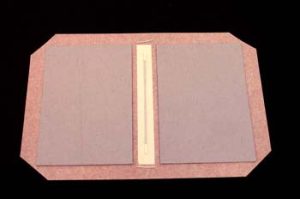
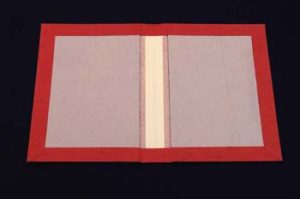
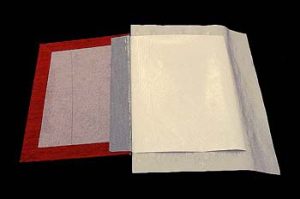
The new end sheets are of double folio construction, and have a cloth hinge. The paper is Mohawk and the hinge is regular hinge cloth. To begin, four folios of length and width dimensions greater than those of the text block are made up (or selected from the pre-cut materials bins, if you keep them made up). |
 |
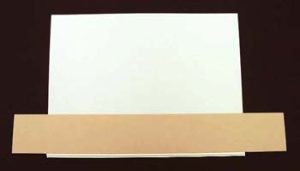
The end sheets are marked and cut to the length of the text block. If you have one, the board shear works well for cutting them off. Otherwise, they are trimmed using a knife and straight edge. In either case, the cut must be square with the spine edge. |
 |
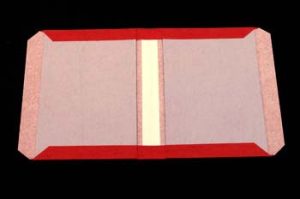
The outer folios are now constructed. Two folios are stacked as shown, and a paper mask is placed on top of the upper one (normally this mask is a scrap of plain white paper, but for the sake of visibility in the illustration, a mask of colored paper was used). The overlap is not less than 1/8″ and not greater than 3/16.” |
 |
Here is a close-up of this arrangement. |
 |
PVA mixture is applied rather liberally to the exposed areas. |
 |
Strips of hinge cloth approximately 1 ¼” wide are now applied. |
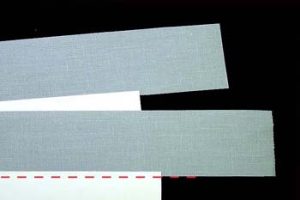 |
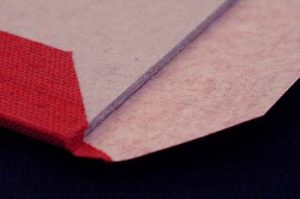
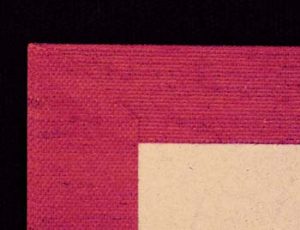
Here is a close-up showing the overlap of the hinge cloth. As stated above, the overlap (indicated by red dotted line) is minimal; only 1/8″-3/16.” |
 |
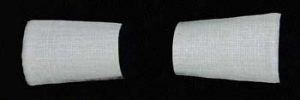
The hinge cloth is now trimmed to a very slight inward angle at the ends. |
 |
The hinge cloth is folded over double and creased at the spine edge, using a bone folder. |
 |
The sides where the hinge cloth is attached to the folios should now look like this. |
 |
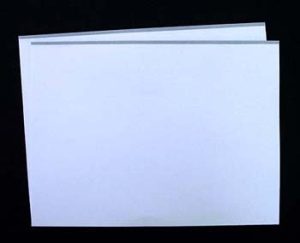
The inner folios are placed inside the hinge-bearing outer folios, and end sheet construction is complete. |
 |
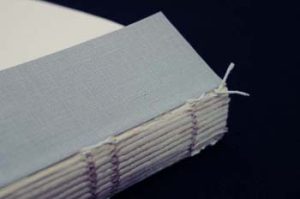
The center of the outermost signature of the text block is located. This will be marked by visible thread stitching. |
 |
Here is a close-up of what you’re looking for: stitching that runs the length of the text block. |
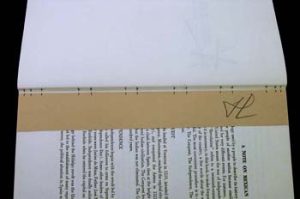 |
A paper template is made, and the location of the sewing stations is marked on both the template and the text block. (Note: The experienced conservation technician often dispenses with the making and use of the paper template, instead sighting the marks by eye and sewing “freehand”. The template is a great aid for the inexperienced and it is advisable to use it until it is comfortable to work without it. Also, the marks on the text block are exaggerated in the photo for the sake of illustration. In practice, they are minimal and are not visible when attachment of the end sheets is finished.) The kettle stitch is marked about 3/16″ in from the end of the book, followed by another mark about 3/16″ further in, followed by another about 3/8″ further in. Both ends are marked thusly. Between these sets of three marks at each end, pairs of marks are made. There are generally about 2″ to 3″ from the ends and about the same distance apart. The distance between the two marks of each pair is 5/16″ to 3/8″. The original sewing pattern of the example book is very similar in configuration to that we are using to attach the end sheets, so the original stitching can simply be followed (the same holes “re-used”). However, this is not always the case. If the original differs significantly from the pattern shown and the measurements given above, it is ignored and no attempt is made to “re-use the holes”. It’s a good idea to mark on the paper template which end of the book is which. The head end is marked in our example. |
 |
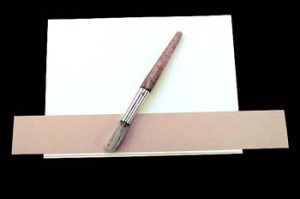
Holes are punched (redefined, if following original stitching) in the text block, at the marks, using an awl, biological dissection probe, or similar tool.
Note: The tool in the illustration is a sculptor’s needle tool. It has been wrapped with cotton twine because it has a rather sharp shoulder at the base of the point, which is somewhat prone to tearing paper when used for the purpose shown. The twine wrapping proved effective in eliminating this concern. |
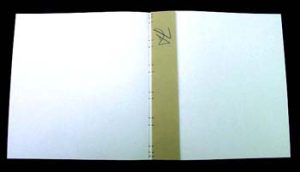 |
The marks from the template are now transcribed onto the new end sheet; in the center fold of the inner folio, on the inside. |
 |
The end sheet is punched through both folios at the marks. |
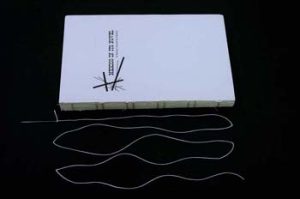 |
The length of thread cut off the spool is 5 times the length of the text block. Each end sheet will require 2 ½ lengths, so by starting with 5, the time of one threading/piercing is saved. Of course, if the book is extremely large (tall), it may be more feasible to thread/pierce twice, once for each end sheet, rather than battle with a huge length of thread. |
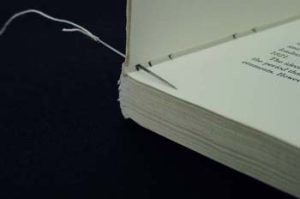 |
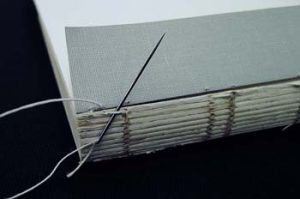
Sewing commences with the text block, at one end or the other (it doesn’t matter which). The first stitch begins on the outside and goes in. |
 |
The next move is to go back out the next hole. |
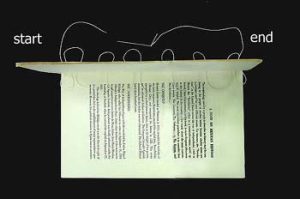 |
From there, the stitching pattern follows a simple linear in-and-out pattern, as shown. |
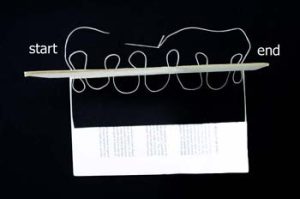 |
In order to even more vividly illustrate the stitching pattern, the same view as that of the previous image is shown, but with a piece of dark material serving as a contrasting background for the loops on the inside of the text block. |
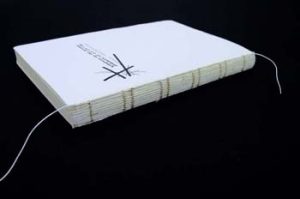 |
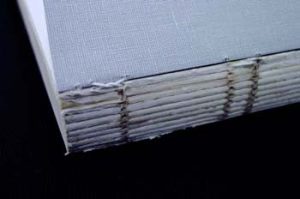
All stitches are pulled tight, and the text block looks like this. Double-check inside to make sure that no loops of loose thread were overlooked. |
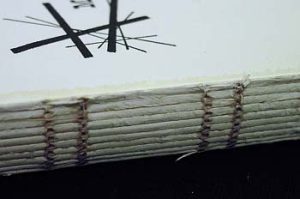 |
Here’s a close-up of what the stitching should look like on the outside at this point. |
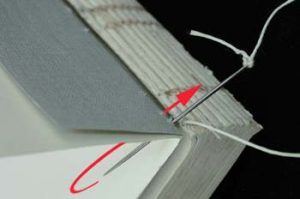 |
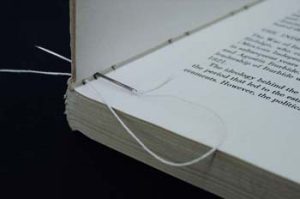
Attachment of the end sheet begins with the same in-and-out that began the stitching of the text block (the “out” being indicated by the red arrow). In the image, you will also see the last stitch coming out of the text block. |
 |
Here is the only detail of end sheet stitching that differs from the text block stitching. The needle is hooked under the short loops of the text block stitching … |
 |
… which interlocks the stitches when pulled tight. |
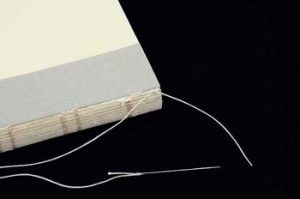 |
This pattern is followed the length of the text block. When the end is reached, the thread in the needle and the beginning tail of thread are tied off in a simple cross knot (if you only know one knot, that’s the one), followed by a second knot of the same type. (It is important that two knots be tied here.) |
 |
You will see that there is enough thread in the needle to complete the sewing on of the other end sheet. |
 |
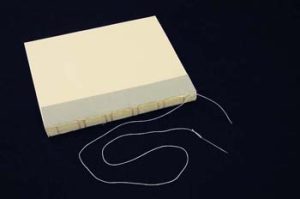
Both ends of the thread are now trimmed to about 3/8″. The attachment of the first end sheet is now complete. The other end sheet is now attached following the same procedure. |
 |
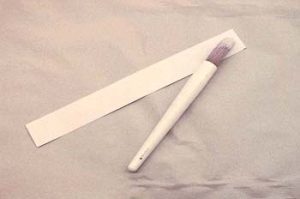
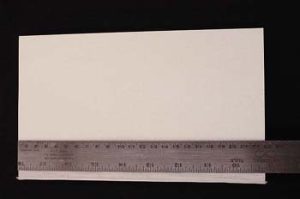
You may have noticed a few steps back that we only trimmed the end sheets to the length of the text block, but not to its width. That’s because it’s a lot easier and really more accurate to wait and do this after the end sheets are attached (or the first end sheet can be trimmed as soon as attachment is complete, before beginning the attachment of the second end sheet…it doesn’t matter whether it’s done then or now). A steel ruler is placed on top of the end sheet, flush with the fore edge of the text block, and the cutting is done with a knife.
The one last step of end sheet attachment is to reinforce the sewing with an adhesive bond. Just the 1/8″ or so of exposed hinge cloth is covered with PVA mixture (see red arrows in photo). The book is then closed so the end sheets are fastened to the text block with adhesive. The book will be going right into the finishing press, so the adhesive will set up and the bond between the end sheets and text block will become permanent during its time there. |
 |
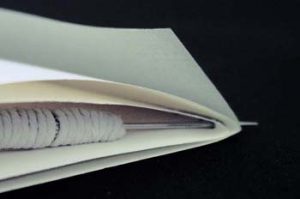
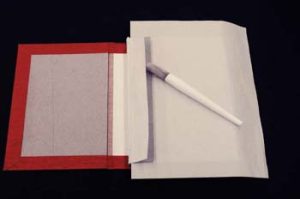
The text block is now placed back in the finishing press, where it will receive the new headbands, super, and paper spine inlay, in that order. Headbands amount to strips of hinge cloth, running grain-short, folded double and with a piece of cotton twine inserted in the fold. If you are going to be doing any quantity of work that will require headbands, it is time-efficient to make up strips of headband material. About 18″ to 24″ seems to be a good length to work from. The total width (height, actually) of these strips is about 1 ¼”. |
 |
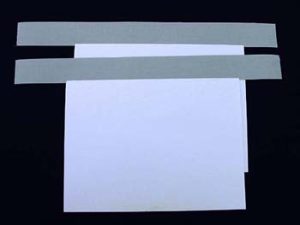
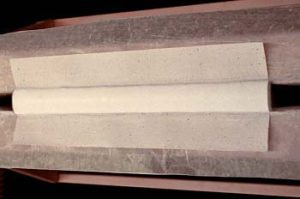
From this strip of headband material, two pieces are cut, each of which is the width of the text block. It is helpful to curl the headbands in the direction indicated in the image, by means of simply rolling them up. They will conform much better to the curve of the text block if this detail is attended to. Of course, if the spine edge of the text block is flat, this isn’t a concern. |
 |
Here we see the text block with the headbands attached. They are affixed with PVA mixture and then rubbed down with a bone folder. They are positioned so that the thickness of the twine just overhangs the ends of the text block. |
 |
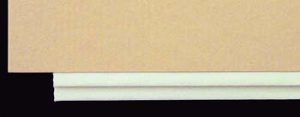
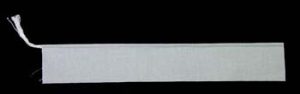
Next comes the super, also called the spine lining cloth. It is trimmed to the length of the text block only…not including the length the headbands just added to it. As you can (somewhat) see in the photo, the length is marked at the inside of the headbands’ twine. |
 |
The super is marked for width; about 1″ to 1 ¼” beyond the width of the text block on each side. |
 |
PVA mixture is applied (rather liberally) to the spine of the text block (not to the super). The super is positioned on the text block, centered both ways, and rubbed rigorously with a bone folder. |
 |
Finally, the paper (Mohawk) spine lining paper is marked and trimmed in the same manner as the super. Again, the length is actual text block length. The width is that of the text block. |
 |
Once trimmed, the spine lining paper is laid on a piece of scrap paper and PVA mixture is applied to it (not to the text block). |
 |
The spine lining paper is applied to the text block and rubbed very rigorously with a bone folder; until an actual slight gloss has been burnished. The text block is now left in the finishing press until the following day. |
 |
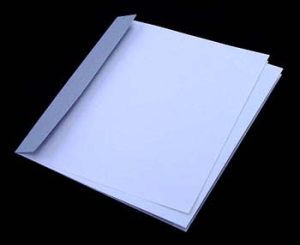
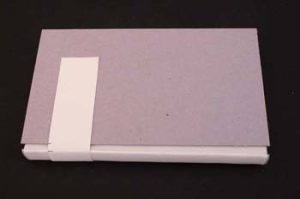
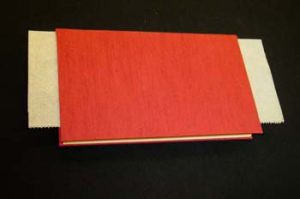
Here we see the text block on removal from the finishing press. The headband, super, and cloth hinge of the end sheet are all visible. |
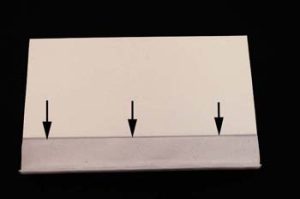 |
One last detail before starting on casing in is to trim the super back to just smaller in width than the cloth hinge of the end sheet, as shown at the arrows. Also, it may be necessary to trim the ends of the super to match the slight inward angle at the ends of the cloth hinges of the end sheets. |
 |
First, measurements for the new boards are made. The width measurement is made from the base of the shoulder to the fore edge. |
 |
The length measurement is the length of the text block, plus 6 mm. |
 |
The boards are cut to these dimensions, then positioned so that there is 3mm of square at the top, bottom, and fore edge. |
 |
A paper template is wrapped around the spine and the board edges and shoulders of the text block are marked. |
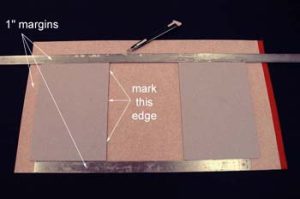 |
The cloth is selected, the boards situated on it and it is trimmed with a 1″ margin at the top and bottom. The board on the left is situated with a 1″ margin of cloth to its left and a line is marked along its right hand (spine) edge. |
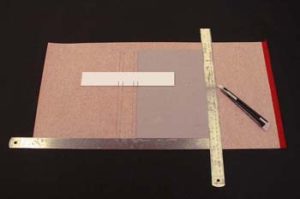 |
The left hand (board edge) mark of the paper template is aligned with the mark just made along the spine edge of the board, and the other marks of the template are transcribed to the cloth. The right hand board is aligned with the other (outer) board edge mark of the template, and the cloth is trimmed 1″ to the board’s right hand edge. The cloth is now trimmed to final overall dimensions. The boards are affixed to the cloth with a 1″ margin of cloth on all four sides. PVA mixture is used for this and is applied to the boards, not the cloth. |
 |
A template is made from two pieces of board measuring about 1″ wide by 6″ long. The two pieces are glued together with PVA mixture. The measurement of this template that will be of use to us is the thickness. The template is placed on edge at roughly a 45 degree angle across the corner, and the cloth is trimmed along its outer edge. This yields a cut two board thicknesses from the extreme corner of the board. All four corners of the cloth are trimmed following this procedure. |
 |
The spine inlay is made from text weight paper. The width measurement is taken from the inner marks of the paper template. The length is that of the boards. It is affixed to the cloth, aligned with the inner marks transcribed from the template, and 2.5 cm from each end (this will be flush with the boards). The paper inlay is laid on a piece of scrap paper, PVA mixture is applied to it, and it is affixed to the cloth.
If the book is from a collection that uses security/detection strips, it is at this time that the strip is attached to the inside of the spine, after the paper inlay has been affixed to the cloth. |
 |
The turn-ins are now fastened down, using PVA mixture. One edge is done at a time, and the top and bottom are done first, before the sides. The cotton twine is centered in the fold at the spine. The turn-in is worked down with a bone folder. |
 |
The corners of the cloth are folded down as shown, using a bone folder. |
 |
The turn-ins of the sides are fastened down, and the covering of the new case is now complete. |
 |
The finished corners should look something like this. |
 |
The text block is situated in the new case so that it is centered both vertically and horizontally, yielding the proper amount of square (3mm) at all edges. The book is placed on the bench, making sure the text block doesn’t shift in the case. Once this has been accomplished, one board is opened and a piece of scrap paper is placed under the flaps of the super and the cloth hinge of the end sheet. PVA mixture is applied first to the cloth hinge of the end sheet, then to the super. |
 |
The scrap paper is removed and replaced with a piece of waxed paper (the heavier the better). The book is now closed, turned over, and the process repeated on the book’s other side. |
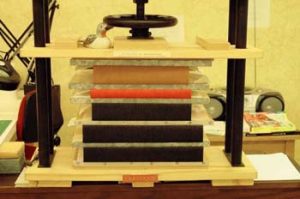 |
The book is placed in a standing press until the following day. |
|
A paper template is wrapped around the spine and the board edges and shoulders of the text block are marked. |
 |
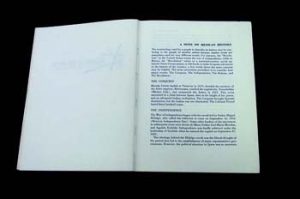
The book is removed from the press and laid open on the bench. A piece of scrap paper is placed under the outermost leaf of the end sheet, which becomes the paste-down. PVA mixture is applied to the entire page. The board is closed, then the book is placed back in the standing press for another day or so. |
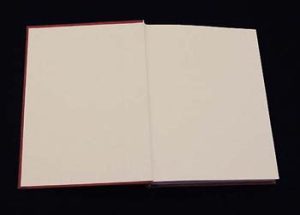 |
The finished paste-down. |
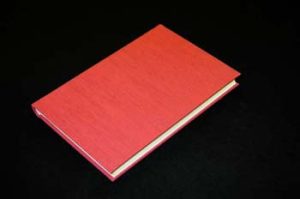 |
The structural work is finished. The only thing left to do, if applicable, is to apply (in some cases after creating) any necessary labeling. This would include the likes of barcode, title label for the spine, call number label, book plate, etc … |
 |
… and the book is back in circulation. |