
1 How to Create PlayPosit Assignments
Using PlayPosit to increase student engagement with your course videos consists of three broad steps:
- Create a new bulb inside PlayPosit.
- Add interactions to the bulb.
- Make that bulb a Canvas Assignment.
STEP 1: Create a new Bulb
- In PlayPosit, click the red ADD NEW BULB button.
- Select a video source (e.g., Kaltura or YouTube), and locate a specific video.
- Title the bulb and perform any customizations such as trimming/cropping the video.
- Click DONE when finished, and you will be taken to the “Interactions” screen.
A repeating animation showing how to add and trim a video from Kaltura.
Step 2: Add Interactions
- Play or scrub the video to the time when you want an interaction.
- Click ADD AN INTERACTION AT and select the type of interaction you want to add.
- Enter the necessary fields (e.g., for a multiple choice question, you must enter the question prompt and at least two answers) and click on Advanced to check settings such as requiring students to complete the interaction and randomizing the order of the answer choices, if desired.
- When finished setting up the interaction, click the DONE button.

A repeating animation demonstrating adding an interaction to a video. - Add other interactions throughout the video based on your learning outcomes.
- To edit an interaction after you have created it, you can just click on the interaction. Alternatively, you can click the three vertical dots in the upper right corner of the interaction to edit it and to see more options, such as setting a different point value.
- Click REVIEW at the top-right of the Interactions screen once you have finished adding interactions. You may wish to review the Playback options to ensure the settings will meet your expectations.
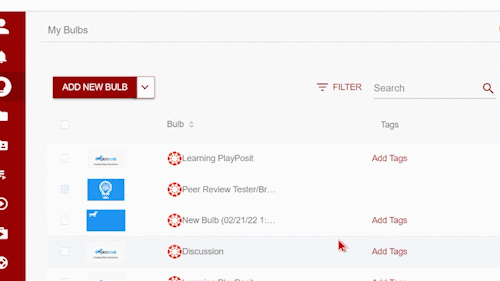
- (optional) Add Tags to your bulb such as the course code, subject, or theme of the video. Tags can be useful when searching for bulbs later, particularly if you plan to build many bulbs.
- (optional) Click PREVIEW to see your bulb from the student view.
- Click SAVE AND EXIT, and you will be returned to the “My Bulbs” page.
STEP 3: Link Bulb to a Canvas Assignment
-
- In Canvas, create an Assignment and enter details such as directions and point value.
- For “Submission Type” select External Tool then click the Find button. Scroll down and select PlayPosit.
- Click SET LINK.
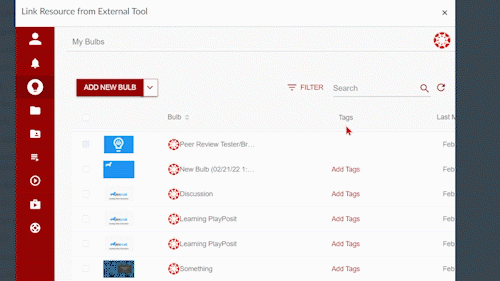
- Click the red circular Canvas logo just to the right of the thumbnail for your bulb – if you just created the bulb, it should be at the top of the list.
A repeating animation of how to set a Bulb link. - Ensure the “Learner Experience” is Self Paced. Click LINK. You will be taken back into Canvas.
- Click the blue Select button.
- Complete the Assignment settings (e.g., assignment group and due date) and Save it.
- Preview the assignment, if you wish. Remember to Publish the assignment when it is ready.
TECHNICAL GUIDES