
During the semester
Using Canvas sections to assign different due dates
There are situations where it may be helpful to give part of your students different due dates for an assignment. For example if you are teaching a hybrid class where part of your students meet in-person one day of the week and another part of your students are meeting on a different day? For example, half the class comes on Monday and the other half on Wednesday. This strategy is also helpful when you have a group of students that have different or additional assignments, such as honors students or graduate students in an undergraduate class.
Creating ad hoc sections in Canvas allows you to
- split your students into two (or more) groups (i.e. a Monday group and a Wednesday group)
- easily assign different assignments and/or different due dates for assignments based on the section
- allow all students in each section to submit the assignment individually (not like groups where only one person per group can submit for the group)
Creating sections
If you crosslisted two (or more) sections of a course, for example a graduate and undergraduate section, you already already have multiple sections in Canvas.
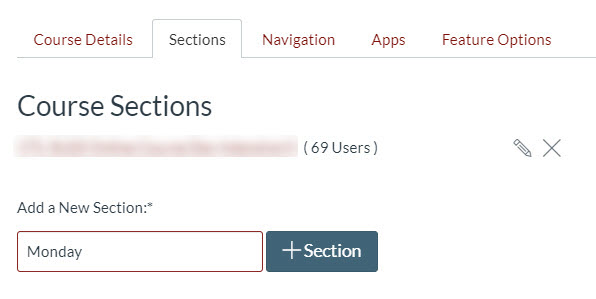
If you want to add sections. go to the course settings page and select the “Sections” tab at the top. It will list your existing Section and then a space below to add a new section. Type in the name of your new section and add it using the “+Section” button. Repeat to add additional sections as needed.
Adding students to sections
Once you have sections, you’ll need to add your students to them. You can add them individually if there are criteria you would like to use to divide students or, if you want to split them in half alphabetically, you can add them in bulk.
Adding students individually
- Go to the People tool
- Select the three vertical dots to the right of each student’s name
- Select “Edit Sections”
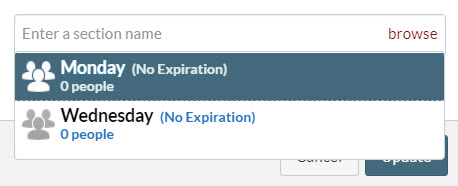
- In the pop-up window, choose “browse”
- Choose the section that each student should be in
- Select “Update” to save your changes
Adding students in bulk
This will allow you to divide students alphabetically into sections. To follow the example above where you would be separating students into a Monday Section and a Wednesday Section, you would have created 2 new sections (Monday and Wednesday) which now show up along with the main section for the course.
- Go to the people tool.
- Select the Photo Roster button at the top right of the page.
- Let the photo roster page fully load. This may take a minute if your class is large.
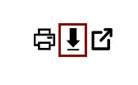
- Once the page has loaded you will find a download button next to the title “IU Photo Roster” between the print button and the “open in new window” button.
- Use the download button to get a .csv file with your students’ IU user IDs.
- Open the .csv file in Excel, Google Sheets, or any other spreadsheet program. Your students will be listed in alphabetical order.
- Copy the user IDs of the first half of your students.

- Go to the Canvas people tool and select the “+People” button at the top right.
- Select the radio button to choose User IDs instead of email addresses.
- Paste in the user IDs that you copied.
- Use the drop-down arrow next to “Section” to select the section you would like to add these students to.
- Choose “Next.”
- Confirm the names of the students and select the “Add Users” button.
- Repeat from step 7 to add the second half of your students to your other section.
Each student should now show up in the People tool with two sections next to their name, the main class section and the additional section for their meeting day.
Once your students are in their sections, you can assign different due dates to each assignment by section. Students will only see the due date for their section. Your gradebook will only show assignments as late if they are submitted after that section’s due date.
Adding different due dates to different sections
To assign different due dates
- Go to the assignment and select “Edit”
- Scroll down to the due dates section at the bottom
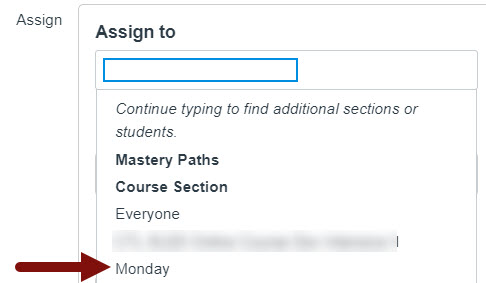
- Select the “X” next to the word “everyone.” A drop-down list will appear with a list of options. You should find at least your first new section towards the top of the list
- Choose the name of the correct section and enter the due date for that section.
- Select the “+Add” button directly below the available dates.
- Select the “Assign to” box. If you don’t find the name of your other section, start typing the name and it will appear.
- Type in the due date for that section.
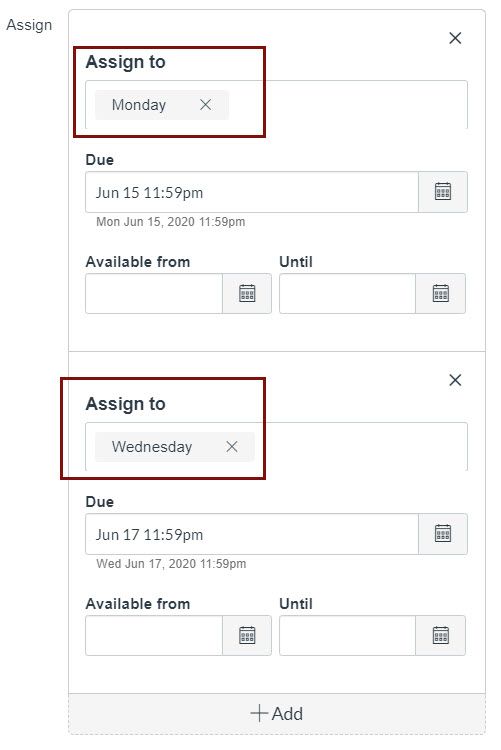
The Assign section of your assignment should now have two parts, one for each section, with two different due dates.
You can now save or save and publish as appropriate.
You will have a “Warning” message pop up saying that you have not assigned this assignment to all the sections. Since you don’t want to assign the assignments to the main class section, choose “Continue” to finish.
For more, review the Canvas Guides on this topic: “How do I add a section to a course as an instructor” and “How do I assign an assignment to a course section?”
