
Working with video (Kaltura, Canvas, Zoom, and PowerPoint)
Recording an individual or group presentation with Zoom
![]()
These instructions presume you are using a desktop or laptop computer.
Zoom will allow you to record video of yourself, other people in the meeting room, and/or your computer screen.
It is strongly recommended to use the Zoom Client for Meetings app for Windows, Mac, or ChromeOS when recording. Review the instructions at the bottom of this page for downloading and logging into the Zoom app if you do not already have it installed.
Instructions
- Open the Zoom desktop app, make sure you are logged in with your IU credentials, and choose the “New Meeting” button. Alternatively, you can go to zoom.iu.edu, log in, and select the “Start a New Meeting” button at the top right.
 If Zoom does not automatically connect to your microphone and speakers, join your audio by selecting the “Join with Computer Audio” button at the bottom left. If this is the first time you have used Zoom with your current microphone or speakers/headphones, it’s a good idea to check your audio quality before recording. You can do that in the audio settings which you access by through the up arrow (^) next to the Mute button once your audio devices are connected.
- If you are using slides, to record them in your presentation use the green “Share Screen” button in the control bar at the bottom.

You can either share your slides in Slide Show view by sharing your whole screen or you can share a portion of your screen if you prefer to keep PowerPoint open to read your notes.- To share your whole screen choose the screen you would like to share from the options available and choose “Share“.

- To share a portion of your screen, use the “Advanced” tab at the top of the window, select the “Portion of Screen” option, select “Share,” and place the green rectangle around the area you would like to share.

- To share your whole screen choose the screen you would like to share from the options available and choose “Share“.
- When you’re ready to start, select the “Record” button at the bottom of the meeting window.
- You will want to record to Kaltura to share your video with others. If you are using the Zoom desktop app, choose “Record to Cloud” to save your video to Kaltura. If you are using Zoom in a browser, your recording will automatically go to Kaltura.
- When Zoom is recording there will be a small red dot at the top left of the meeting window.
- When you are done recording, choose the “Stop Recording” button in the control bar at the top right and then select “End” at the bottom right and then “End Meeting for All”.
- Once you end the meeting, your video will automatically be sent to your Kaltura account. The transfer is not instantaneous. You will receive an email notification when the video is ready.
- If you would like to edit your video, visit the Editing your Video page.
Group recording with Zoom
Zoom allows you to record a presentation with multiple people at different locations. If your group is available to record together at the same time, you can use Zoom to record as described above.
Inviting group members
One person in the group will start the meeting using their Zoom account and then invite the rest of the participants. To invite others to the room,
- Choose the “Participants” button on the control bar at the bottom of the Zoom window
- Select “Invite” at the bottom of the participant list that will open to the right of the meeting room
- Select the “Copy Invite Link” button
- Send your group members that link and they will be able to use it to join you in the Zoom meeting room.
Recording tips
- The recording will show what the meeting host sees. If you want all participants showing all the time make sure the host’s view is set to show everyone by choosing Gallery View at the top right of the Zoom window. If you only want to record the video of the person talking, make sure the host’s view is set to only show the speaker by choosing “Speaker View” at the top right of the Zoom window.
- Rehearse your presentation to smooth the transitions between presenters.
- If you are using slides, it is easiest to have all the slides in one file and shared by the host instead of having each person share their own slides.
Submit Your Presentation to an Assignment
Once your video is in Kaltura, based on your instructor’s instructions:
- Submit your video by embedding it in a text box in an Assignment or Discussion.
- Submit your video by adding it to the Kaltura: Media Gallery for your course
Other information
A Note on Video Processing
When a video is first uploaded to Kaltura you will have a “media is being processed” animation where you expect your video to be.
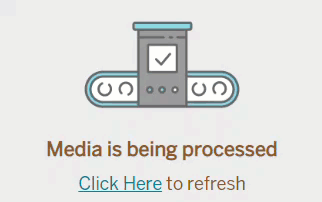
Please be patient. Processing time depends on the length of the video and the number of other videos Kaltura is processing. It will appear once it has completed processing, though you may need to refresh your page. You can embed a video that is still processing in Kaltura.
Downloading and using the Zoom desktop app.
- Go to the Zoom Download Center to download the Zoom Client for Meetings for your operating system.
- After the file downloads, open it and follow the prompts to install. You may need administrator privileges on the computer you are using.
- Once Zoom is installed, open the app and you will be prompted to log in. (Video walkthrough of logging in to the Zoom app)
- Choose “Log in with SSO” on the right
- Type “IU” in the text box and select “Next”
- Log in with your IU login and Duo
Verifying the Automatic Captions on Your Video
All video uploaded to Kaltura is automatically mechanically captioned using speech-to-text technology. If you’ve ever used speech-to-text, you know it’s never 100% accurate so you need to check your captions and edit as needed to make sure they are correct and not saying anything embarrassing. The mechanical captions appear fairly quickly on short videos once they’re uploaded. You can check them either in the Kaltura: My Media tool if it is available in your course, or at Kaltura Mediaspace. Instructions on checking and editing your captions are at Accessible Videos in this book.
