
Working with video (Kaltura, Canvas, Zoom, and PowerPoint)
Recording an individual presentation with Kaltura Personal Capture
These instructions presume you are using a desktop or laptop computer running either Windows or iOS. Kaltura Personal Capture does not work on a Chromebook or a computer running a Linux OS.
Personal Capture will allow you to record a video of yourself and/or video of your computer screen.
Video Walk-Through
The following video contains captions that you can turn on using the CC button at the bottom right of the video player.
Instructions
- If you do not already have Personal Capture installed, install the Personal Capture app
- Go to Kaltura: My Media in Canvas, Kaltura Mediaspace, or the “Embed Kaltura Media” button (
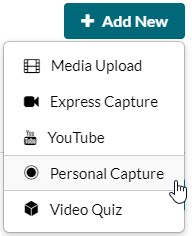
 ) in the toolbar across the top of the text editor in the assignment. Choose Add New and then Personal Capture.
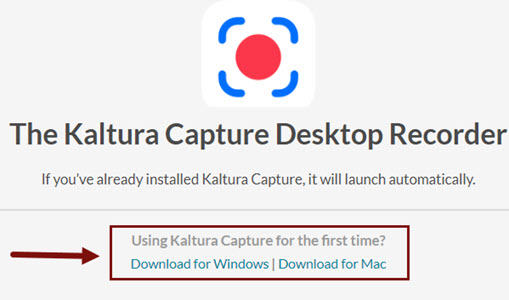
- You’ll then be prompted to download either the Windows or Mac version. After the file downloads, open it and follow the prompts to install.
- Go to Kaltura: My Media in Canvas, Kaltura Mediaspace, or the “Embed Kaltura Media” button (
- Record your video
- Open the Kaltura Personal Capture app as you would any other app on your computer. There is no need to log in until you are ready to upload your video to Kaltura. You can record a new video by selecting the “New Recording” button at the top of the window.

- In the Personal Capture recorder, you have the option of choosing to record your camera, your screen, and your microphone. The image below shows the app set to record only the webcam and the microphone. The source you wish to record must be activated to be captured. Active sources are blue, inactive sources are gray with a line through them.
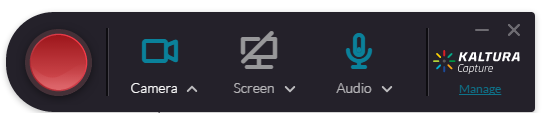
- If you have more than one camera or microphone attached to your computer, you can select which one you want to use with the drop-down arrow next to each source.
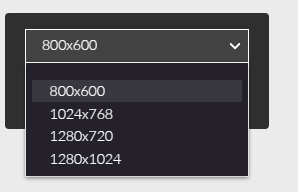
- If you are recording your screen, you can choose to record your entire desktop or just a portion of it. If you choose to select an area, Personal Capture will offer a selection of standard video-sized areas but you can also create a custom-sized area by dragging the dotted lines surrounding the selection either in or out. 1280×720 will fit PowerPoint slides created in the widescreen format.
- When you record your screen and your webcam, both will be recorded for the entire time so you do not have to do anything to switch back and forth. Note that the option you activated first (either screen or webcam) is what will appear as the main image on the video in picture-in-picture mode. The viewer can switch back and forth but if you have a preference, choose that input option first.
- Begin recording with the red Record button. You will have a 3-second countdown before recording begins.
- Open the Kaltura Personal Capture app as you would any other app on your computer. There is no need to log in until you are ready to upload your video to Kaltura. You can record a new video by selecting the “New Recording” button at the top of the window.
- To pause or stop recording use the buttons on the recorder, which will now be at the bottom right of your screen.

- Review and upload your video
- When you stop recording you have the following options:
- Preview your video
- Change your video’s title
- Add a description or tags
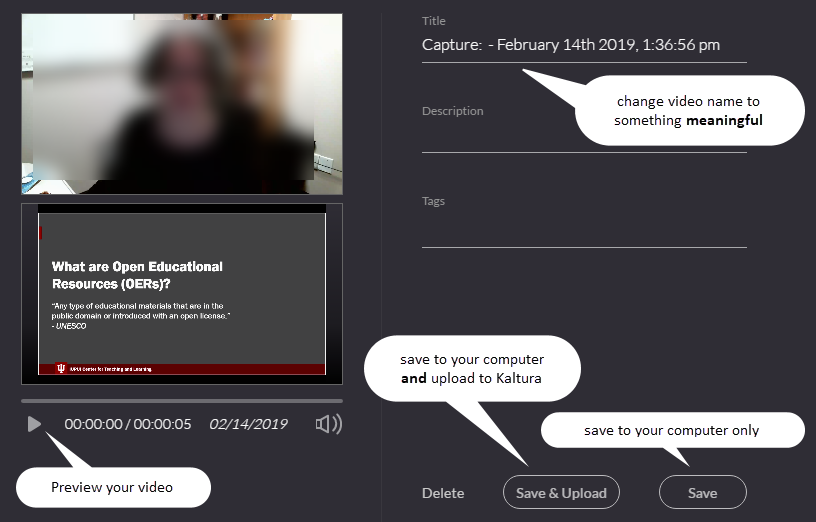
(select the image to view larger)
- When you are ready to save your video, you can either save your video to your computer only or save to your computer and upload it to Kaltura.
- When you stop recording you have the following options:
Submit Your Presentation to an Assignment
- Submit your video by embedding it in a text box in an Assignment or Discussion.
- Submit your video by adding it to the Kaltura: Media Gallery for your course
Verify the Automatic Captions on Your Video
All video uploaded to Kaltura is automatically mechanically captioned using speech-to-text technology. If you’ve ever used speech-to-text, you know it’s never 100% accurate so you need to check your captions and edit as needed to make sure they are correct and not saying anything embarrassing. The mechanical captions appear fairly quickly on short videos once they’re uploaded. You can check them either in Kaltura: My Media if it is available in your course, or at Kaltura Mediaspace. Instructions on checking and editing your captions are at Accessible Videos in this book.
Note on Video Processing
When a video is first uploaded to Kaltura you will have a “media is being processed” animation where you expect your video to be.
Please be patient. Processing time depends on the length of the video and the number of other videos Kaltura is processing. It will appear once it has completed processing, though you may need to refresh your page. You can embed a video that is still processing in Kaltura.
