
Canvas accessibility for instructors
Accessible media in Canvas
This chapter is about media created for and shared in Canvas, not about classroom capture video.
Including video and audio in your Canvas site along with text and images can improve student learning and engagement. These elements also need updating to be accessible. This involves making sure they have accurate captions or transcripts.
All of the video and audio you create to share with your students should be stored in Kaltura. You may have videos in your courses from different sources including Kaltura, YouTube, library video databases, publishers, or other sources. In this chapter we will focus on videos you have created and shared with your students in Canvas – primarily lecture and demonstration videos.
Kaltura is the IU-licensed tool for media storage. It provides automatic mechanical captioning for all media and the ability to upload caption files you may have created using Adobe tools, Microsoft Clipchamp, or other video editing tools.
Identifying your existing media
It can help to start by sorting your current videos into three groups,
- Videos you need or want to re-record due to changes in content, course structure, or textbook, or other reasons
- Videos you will continue to use as-is.
- Videos you won’t use or re-record in the future.
As you’re sorting your videos, it will help to add some additional information for those in the first two groups.
- If you are re-recoding videos that use slide decks, add a note about the location of the slide deck so you can find them easily.
- For videos you will be using as-is, add a link to the video in Kaltura so you can easily get to the caption editor. If you have videos in the Canvas Files tool or that you are sharing from a link to Teams or OneDrive, this is a good time to download them and upload them into Kaltura.
You may find it helps to make a table with this information, so you have it all in one place. If you would like an example table to get started, you can download a sample video inventory table in Word.
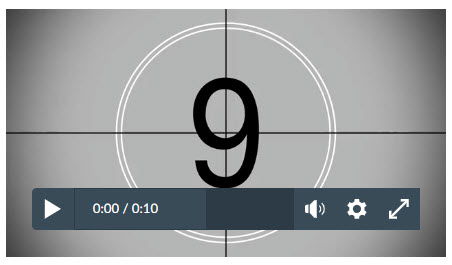
You can identify these videos by the video player they use. The native Canvas video player only has play/pause button, video time display, and volume, settings, and full screen icons below the video. It does not have an icon for captions or a Kaltura or YouTube logo icon.
Recording new videos
Whether you’re re-recording existing videos or recording new content, it’s important to keep accessibility in mind. We’ll begin with things you can do while you are creating your videos followed by things you can do after your videos are recorded. Note that these are not all of the things to consider when creating video. Video and audio quality also impact accessibility.
One thing that will make this easier is to not try to use classroom recordings. Record your videos on your computer or in a campus media studio. Recording in a classroom has both audio and visual quality challenges. Recording in your office, dining room, or a campus media space makes for better quality videos.
The most common types of video instructors create for their students are
- Lectures using a slide deck (aka voice-over-PowerPoint videos)
- Screen-capture demonstrations or how-to tutorials of software applications, web tools, or other digital tools. This includes a Canvas tour video that you may record for the beginning of a new semester.
Other types of instructional videos include lecture videos where the instructor is talking to the camera without slides or other visual aids, interviews, field recordings, or physical or biological science labs. If you are creating more complex videos such as lab experiments or on-site explorations of rock formations, architecture, or medical procedures, contact the ATAC at atac@iu.edu for guidance.
Recording a lecture using a slide deck
- Update or create your new slides following the PowerPoint recommendations in the previous chapter. Having an accessible PowerPoint file helps to make the video more accessible.
- Describe what is on your slides. If someone is only listening to your video, can they still learn what you want them to learn? Many students consume media content by listening to audio while driving, working out, or doing other things that require their visual attention. Describing instructional images, tables, charts, and diagrams as you are talking about them helps everyone trying to learn the content.
- If you have slides only containing bullet points, read the list out loud at the beginning so students listening have the same advance knowledge of what will be covered. You may want to consider ways to use your slides more as a visual aid to your lecture than as a repository of your full lecture notes. Notes can be placed in the notes area below the slide and accessed in the presenter view of your PowerPoint slide show.
- Additional best practices for video lectures with slides
- Make your slides readable. Put less text on each slide and use a larger font size. If you’re unsure, watch your video on your phone. If you can’t read your slides with your phone at arm’s length, increase your font size.
- Include your video when possible – especially if you are recording for an asynchronous online class. If you are recording in Zoom or Kaltura Personal Capture you can record both you and your slides at the same time. Loading the video in Kaltura allows students to switch back and forth as they like. It adds instructor presence and lets students read your lips as you talk.
Recording a screen capture demonstration or tutorial
- Describe what you are doing and where it is on your screen. Clicking a menu item and then three other sub-menu items isn’t helpful if students can’t see what you’re clicking on. It helps to get in the habit of narrating your actions by saying things like “I’m selecting the insert tab at the top left, then the insert pictures icon, then the “this device” link.”
- Zoom in on the area where you are working if possible. If someone has low vision or is watching your video on a phone screen, they likely can’t see the details of what you are showing. This is especially true if you’re showing everything on your full-size monitor. How you zoom in will vary depending on the tool you are using to record your screen.
- If you are drawing on a tablet, describe what you are drawing as you draw it. If you are annotating an article, diagram, or math problem, identify where you are drawing as well. For example, “In this Venn diagram, I’m shading in the area where circles X and Y overlap because . . . .”
Checking captions on a recorded video
Once your video is recorded, whether it is a newly recorded video or an older one you still use, it will need captions. When you upload video into Kaltura, Kaltura will generate mechanical captions. If you record in Zoom and select “save to the cloud,” Zoom will generate captions which it will pass through to Kaltura. Some video editing programs like Microsoft Clipchamp or Camtasia will also create captions for you that can be uploaded into Kaltura.
You will always need to check mechanical captions and correct errors. Whatever application generates captions, it’s important to realize they are never going to be perfect. They are generated with speech-to-text technology which will not be 100% correct.
You can generally expect mechanical captions to be between 75% and 90% correct. Captions need to be verified and corrected before sharing the video with your students to ensure they are saying what they should be saying. It’s not uncommon for speech-to-text to miss a “not” or an “un-” at the beginning of a word thereby changing the meaning completely. Mechanical captioning tends to have the most difficulty with technical terms, acronyms, non-English words and names, speakers who speak very quickly, and speakers with a strong accent.
Editing Captions in Kaltura
If you are using Kaltura or Zoom captions, it’s fairly quick and easy to verify them in Kaltura. Note that the mechanical captions do not appear immediately after the video finishes processing so please be patient and give them a few minutes. Editing captions is also a step that can be done by a TA if you have one for your class.
To update your captions:
- Log into Kaltura, select your name at the top right, and select
- Select the edit (
 ) icon to the right of the video you want to edit.
 - Select the Captions tab below the video

- Select the “Edit Captions” button.
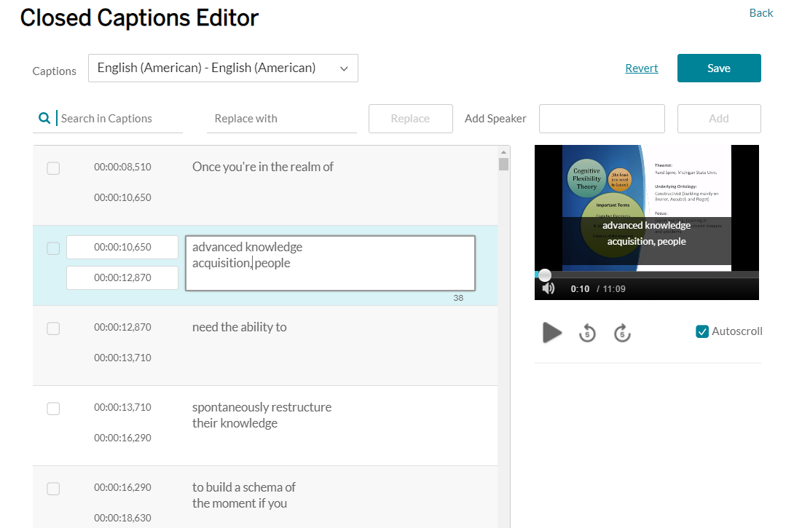
- The caption editor will open showing the captions on the left side of your screen and the video sits on the right.
- Select the caption you wish to edit and it will open as an editable text field. The video player will jump to that spot and you can play the audio that was transcribed.
- Mechanical captioning is not good a punctuation. You will always want to check that it’s not splitting sentences or combining them incorrectly.
- If you verify captions very shortly after recording while your memory is fresh, you can often catch issues by reading through the captions and only playing the video to check ones that don’t make sense.
- Verifying captions is much easier if you created your video from a pre-written script. You can match the captions to you script and only listen to the audio where the two disagree.
- When you are finished making edits, scroll back up to the very top of the page and select the . If it is a longer video, make sure to save often as Kaltura does not autosave caption changes.
If you find that Kaltura or Zoom is having difficulties understanding your audio, you may want to try Microsoft Clipchamp for transcription. It appears to do a bit better. You can edit the transcript in Clipchamp, download the captions, and upload them into Kaltura. For detailed instructions, visit the Clipchamp section of Michael Mace’s Accessible and Engaging Videos webinar. To access that section, select the three horizontal lines at the top left of the video and select Clipchamp.
Note that if there are multiple speakers in the video, each speaker needs to be identified by name in the captions when they begin speaking. If you have multiple speakers in your video you may want to use Clipchamp to generate captions as it will identify individual speakers automatically.
When you add your video to Canvas, students will be able to select the CC (Closed Caption) icon on the bottom of the Kaltura video player to turn on accurate captions to support their learning.
Transcripts for audio
Podcasts or other audio-only content get transcripts in place of captions. Just like with video, if there are multiple speakers, each speaker needs to be identified in the transcript when they begin speaking.
The best way to get a correct transcript is to record from a written script. After recording, you can add in anything you said that wasn’t on the script or remove things you skipped and share the accessible document with your students.
If you have audio content already recorded, you can upload it to Kaltura to auto-generate a transcript. After verifying the text in the caption editor, you can download the transcript and upload it into Canvas. To download the transcript, select the download icon (![]() ) at the bottom of the video player. Alternatively, you can open the audio file in Microsoft Clipchamp and have it generate a transcript that you can download as a Word document. If you have multiple speakers in your audio you may want to use Clipchamp as it will identify individual speakers when generating the transcript.
) at the bottom of the video player. Alternatively, you can open the audio file in Microsoft Clipchamp and have it generate a transcript that you can download as a Word document. If you have multiple speakers in your audio you may want to use Clipchamp as it will identify individual speakers when generating the transcript.
Adding your audio and transcript to Canvas
You can choose to embed your audio content into a page or assignment or other Canvas tool using Kaltura icon in the RCE. You can also embed it directly with the Add Media tool in the RCE. Both of these ways provide an audio player so that students can stream the audio directly from the page. You can then link the transcript above or below the audio player.
You could also add the audio file to the Canvas Files tool for download but that shouldn’t be the only way students can access it. Students with limited data plans on their phone may not be able to download large audio files. Streaming options use much less data than downloading a file.
Getting Help
If you need help updating your course, please feel free to reach out to your campus teaching and learning centers. Centers are staffed with instructional technology experts who can provide advice and guidance about basic accessibility and universal design for learning.
You can also reach out to the Assistive Technology and Accessibility Centers (ATAC). They can provide training and guidance on how to create accessible materials and are familiar with most learning technology platforms. For questions about digital accessibility, contact the ATAC at atac@iu.edu.
captions created through the use of speech-to-text technology